It SNMP v3 settings are available in ESXi, in this article describes Configure SNMPv3 in ESXi host.
Simple Network Management Protocol (SNMP)
TCP/IP uses SNMP at the application layer to monitor and manage the network. As its name implies, it is also used to resolve network faults. Additionally, it is sometimes used to change the configuration of remote end devices in a network. Modems, routers, firewalls, switches, printers, and servers are compatible with Simple Network Management Protocol.
A SNMP agent uses UDP port 161 for sending and receiving requests, and a manager uses UDP port 162 for receiving SNMP traps from devices.
SNMP performs its basic tasks via three components, below are the components.
- SNMP Manager
It is also known as a Network Management System (NMS) and is a centralized GUI-based node system that monitors the network. The NMS node and the network elements communicate bi-directionally through it.
- SNMP Agent
A network agent is a component of network management software installed on a network device such as a server or router. As a result, the agent manages the database on the managed network elements. When the NMS requests information, it provides the information which was stored in the database to the NMS. The agent sends an SNMP trap message to the SNMP manager when it detects a trap or error on a managed device.
- Management Information Base (MIB)
Every SNMP agent maintains a database of information related to managed devices, providing details about their parameters. When the SNMP manager requests information about a device for NMS, it refers to this database. It is therefore called a Management Information Base because this information is shared between the agent and manager.
Simple Network Management Protocol Versions
- SNMPv1: The authentication is based on community names, so it also returns fewer error control codes with low-security
- SNMPv2: The security of SNMPv2c may be adequate for internal networks, but it should never be considered for public networks and improved error handling
- SNMPv3: Above mentioned versions are Community based authentication and no data encryption, however, SNMPv3 is user & group-based authentication and supports DES/SHA/MD5/AES data encryption and also supports public/internet-facing networks.
Procedure to Configure SNMPv3 in ESXi
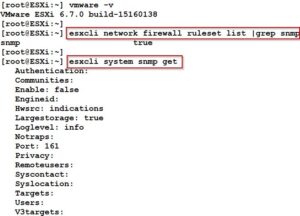
Step 1: Enable SSH service and SNMP allowed in firewall on ESXi host.
In my ESXi host SNMP not configured.
Step2: Setting up ESXi authorization and privacy protocols, as well as generating hash values for the privacy and authentication settings is also essential.
Using the hash output values in the second box, create a user (bhanuwriter) that will query the SNMP service.
esxcli system snmp set –users <username>/authentication hash/privacy hash/model<noAuthUser/authUser/privUser>
Step3: Now set up the SNMP trap receivers for the host alarms on ESXi
esxcli system snmp set --v3targets <Receiver IP Address>@162/username/model/message-type
At Receiver IP Address provide your SNMP server IPaddress, username is bhanuwriter in my case and model is priv , message type is trap.
Step4: Finally Enable SNMP service on ESXi host.
esxcli system snmp set –-enable trueesxcli system snmp get
Run the following command to send a test trap after the far-end trap receiver is configured for SNMPv3 and confirm that the administered destinations are getting SNMP notifications.
esxcli system snmp test
NOTE: To configure SNMP on vCenter Server level the procedure is different.
Overview: Configure SNMPv3 in ESXi has been explained. It is recommended to use snmpv3, for authenticating and encrypting data packets for transport over the network, SNMP Version 3 allows secure access to devices.


