In this article discussed about Adding Memory and CPU with PowerCLI in VMware vSphere environment.
It is possible to increase Memory or CPU of a virtual machine only if hot plug is enabled. Without that, you have to power off the virtual machine and make the changes.
In order to use PowerCLI will take Windows PowerShell as a source.
Adding Memory and CPU with PowerCLI for a Virtual Machine:
Step1:
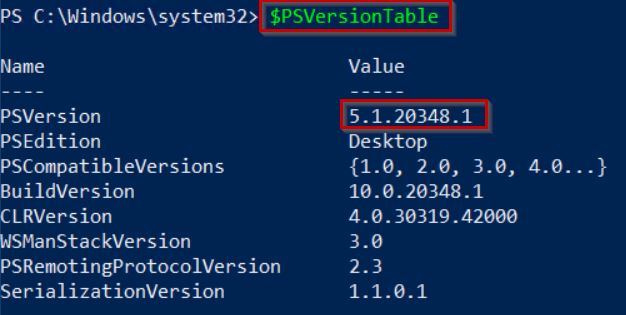
VMware PowerCLI is compatible minimum with Windows PowerShell 5.1 version.
let’s check PowerShell version in windows machine. Open Windows PowerShell and Run as administrator.
Step2 :
Try to execute VMware PowerCLI modules from Windows PowerShell, as shown in below picture.

The above error defines VMware PowerCLI Module was not installed. Since don’t have any Internet connectivity to install PowerCLI on my machine, will Install PowerCLI Offline mode.
Install PowerCLI modules in offline:
Step3:
Check in below mentioned location if any VMware Modules are existing.
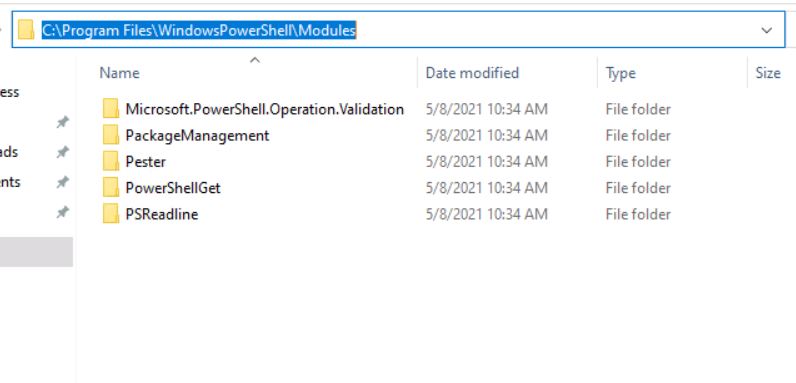
you can see VMware Modules are NOT existing. So download latest click VMware PowerCLI ZIP file
Step4:
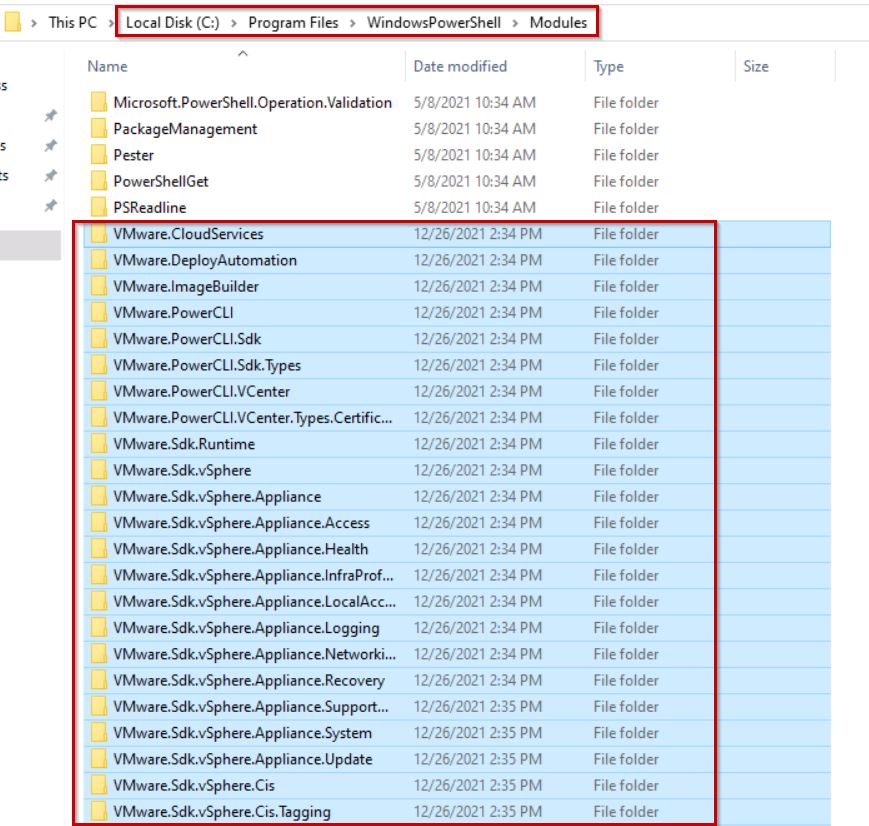
Copy the ZIP file to your windows machine and extract the zip file and COPY all folders to below location.
Step5:
Now check VMware PowerCLI Module functionality
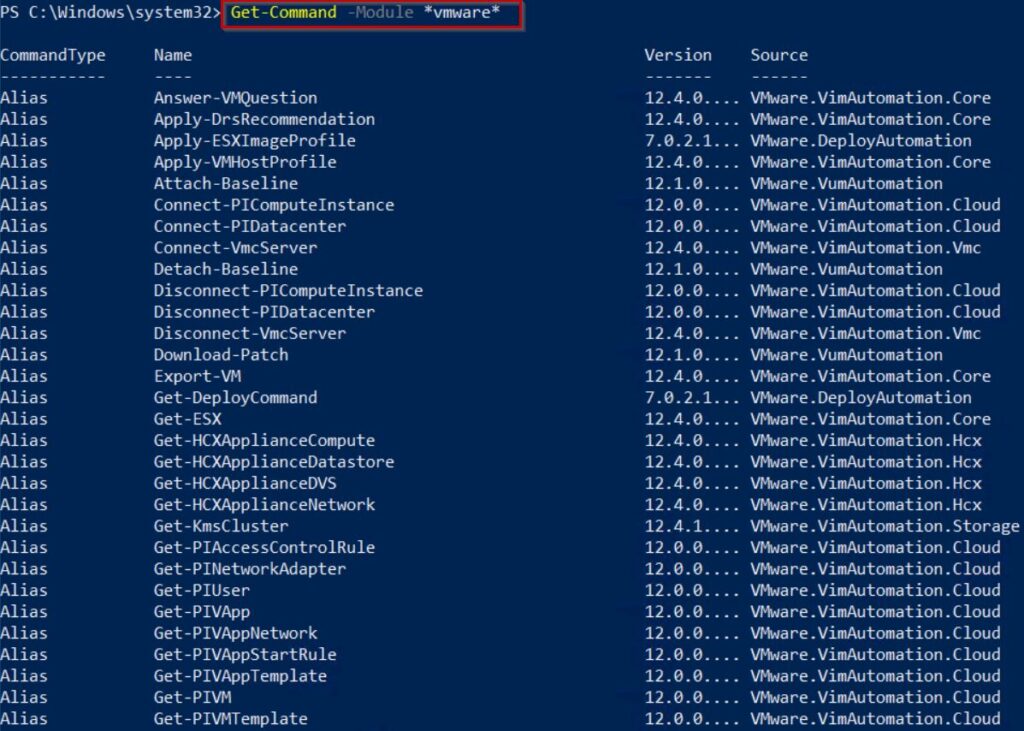
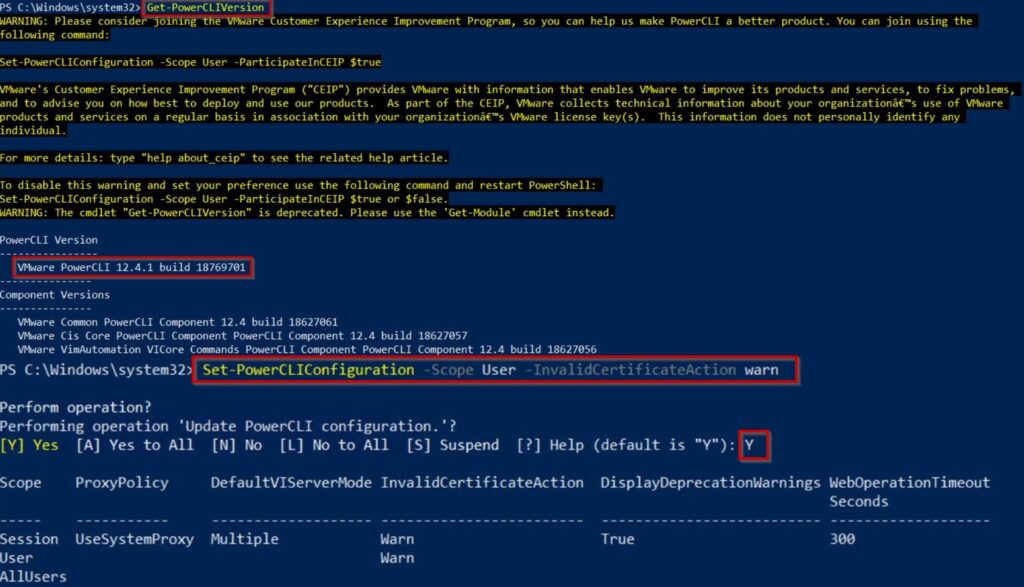
Also check PowerCLIVersion and we can ignore the certificate warning, we need to run a basic configuration command so that we are not prompted to join VMware’s Customer Experience Improvement Program.
you can also use Set-PowerCLIConfiguration -Scope AllUsers -ParticipateInCeip $false -InvalidCertificateAction Ignore
Using PowerCLI Connect to VMware vCenter Server:
Step6:
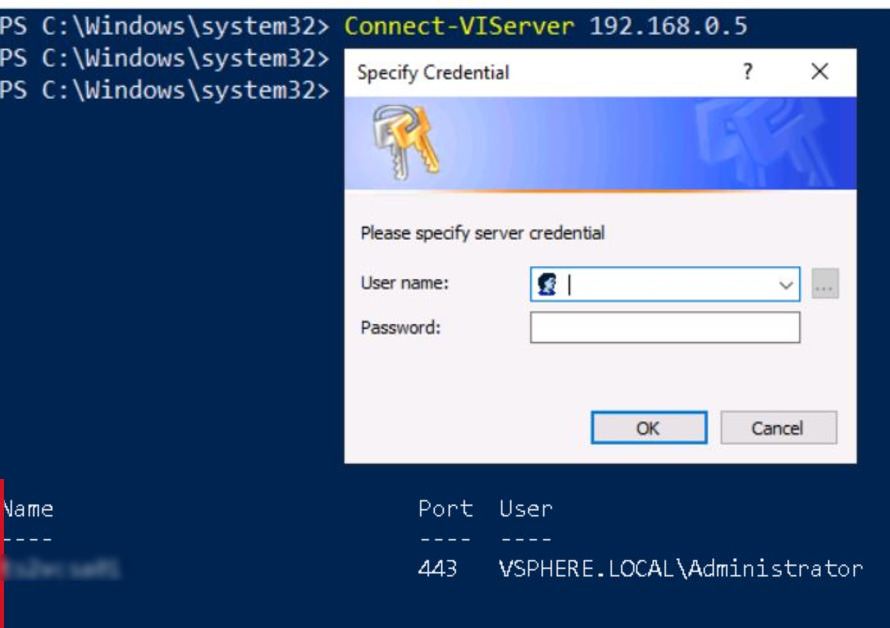
In order to increase virtual CPU and virtual memory connect to vCenter Server by using Connect-VIserver IPaddress or hostname and Provide username and password
Enable Hot Plug for CPU and Memory:
VM called TEST which we are going to increase CPU. Firstly, check TEST machine Status and current CPU Count.

Before going to increase the CPUs count its mandatory to enable Hot Plug. In fact, by default hot plug was not enabled in VMware vSphere environment for CPU and MEMORY.
In order to enable Hot Plug for CPU or MEMORY to a virtual machine it must be in POWEROFF STATE. As you see above picture TEST machine is in Powered On state, let’s power OFF and enable Hot Plug for CPU and MEMORY.
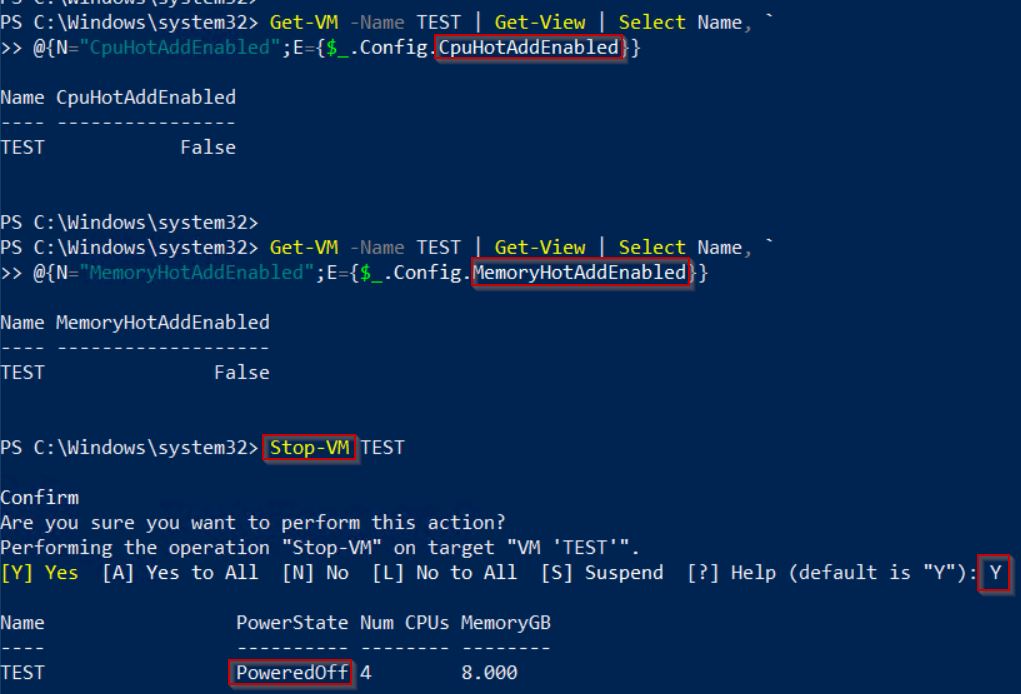
Above screenshot describes hot plugin status for CPU and MEMORY it was FALSE (disable state). To Enable, we must the Power OFF the VM (TEST).
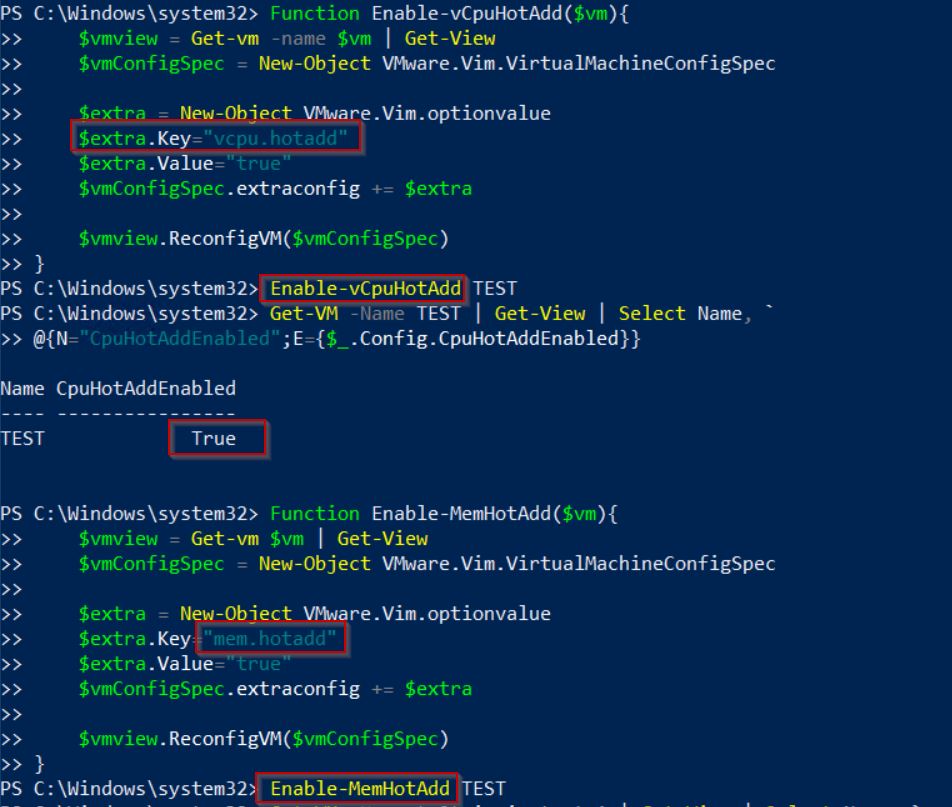
Now Enable Hot Plugin for CPU and MEMORY and check status of hot add, it is TRUE (enable state).
Increase Memory and CPU:
Step7: Since we enabled Hot Plugins, now increase CPU and MEMORY to TEST virtual machine.
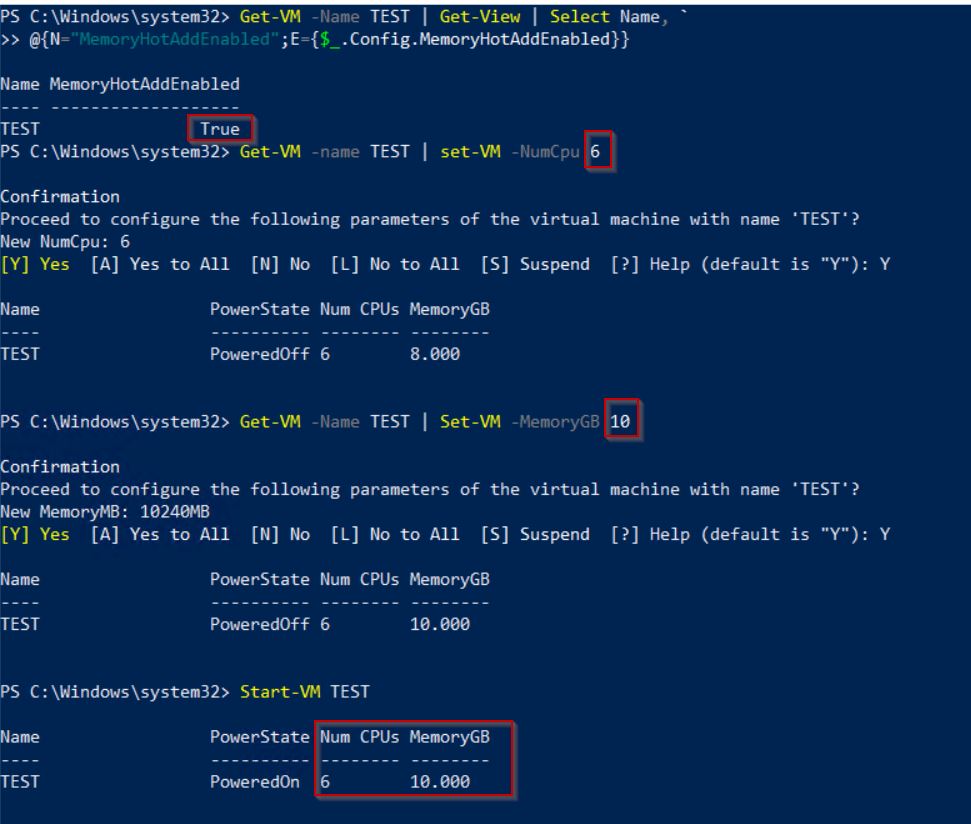
NOTE: To Enable or Disable Hot Plugin VM Must be in powered OFF state.
conclusion:
Adding Memory and CPU with PowerCLI has been completed successfully. I hope you will find this PowerCLI script useful and will find the output with the list of Virtual machines that have hot add memory & hot plug CPU status helpful.
Thanks for your time, leave a comment if you have any queries about Adding Memory and CPU with PowerCLI.
As VMware advanced concept written NSX-V and NSX-T differences.

