In this article will discuss about change winrm listener port in windows operating system.
Windows Remote Management (WinRM) you read official Microsoft document.
Windows Management Instrumentation can be remotely accessed or used locally via scripts.
Windows Management Instrumentation instructions will be provided in two ways.
- Windows Remote Management (Remote Management)
- Distributed Component Object Model (older technology)
Windows Remote Management can be enabled using:
- Windows PowerShell.
- Server Manager.
- Windows Remote Shell (WinRS).
WinRM listener runs as a service on computers that is waiting for connections to attempt to be established.
Winrm listener port can listen on two different ways:
- Hypertext Transfer Protocol (HTTP) or
- Hypertext Transfer Protocol Secure (HTTPS).
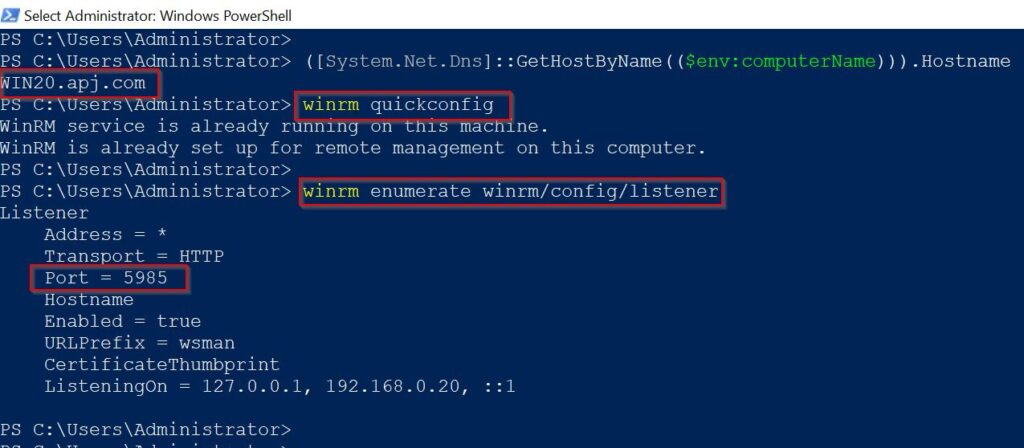
In fact, the WinRM HTTP port is 5985 and for HTTPS is 5986 by default.
It is recommended to stick with the default listening ports for compatibility and ease of use.
Below is windows server 2019 domain controller called apj.com and server name WIN20.
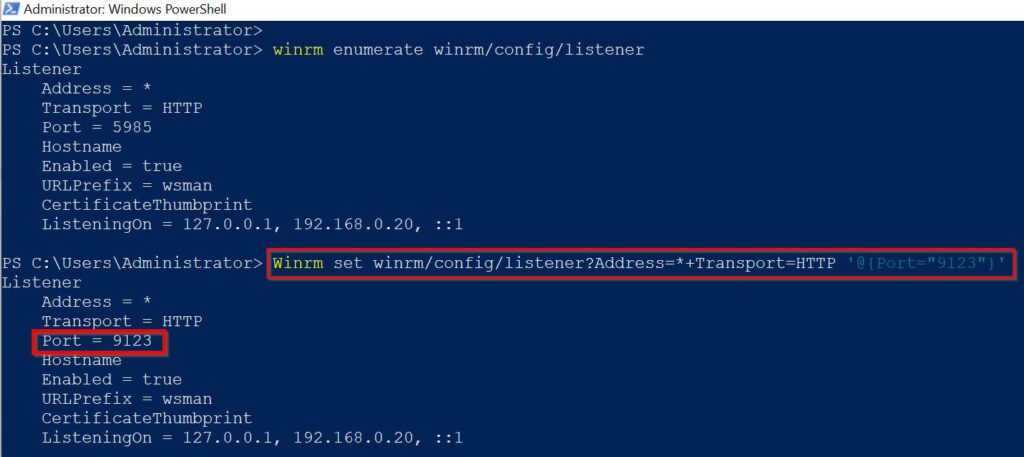
Open Windows PowerShell admin and check currently listener port .
Change WinRM Listener Port
Let’s change WinRM listener port for HTTP from 5985 to 9123.
Create a Firewall rule to allow WinRM traffic:
Open run menu and type wf.msc .
Click on Inbound Rules and select New Rule.

select Port and specific the port number as 9123 and protocol will be TCP.
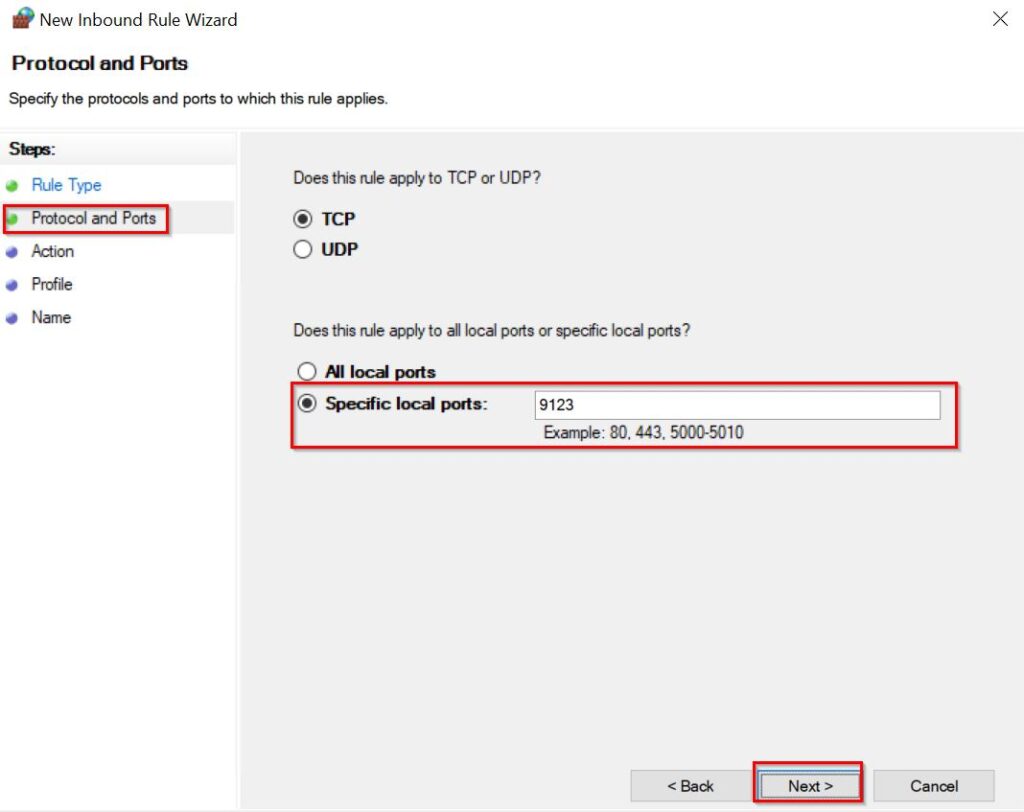
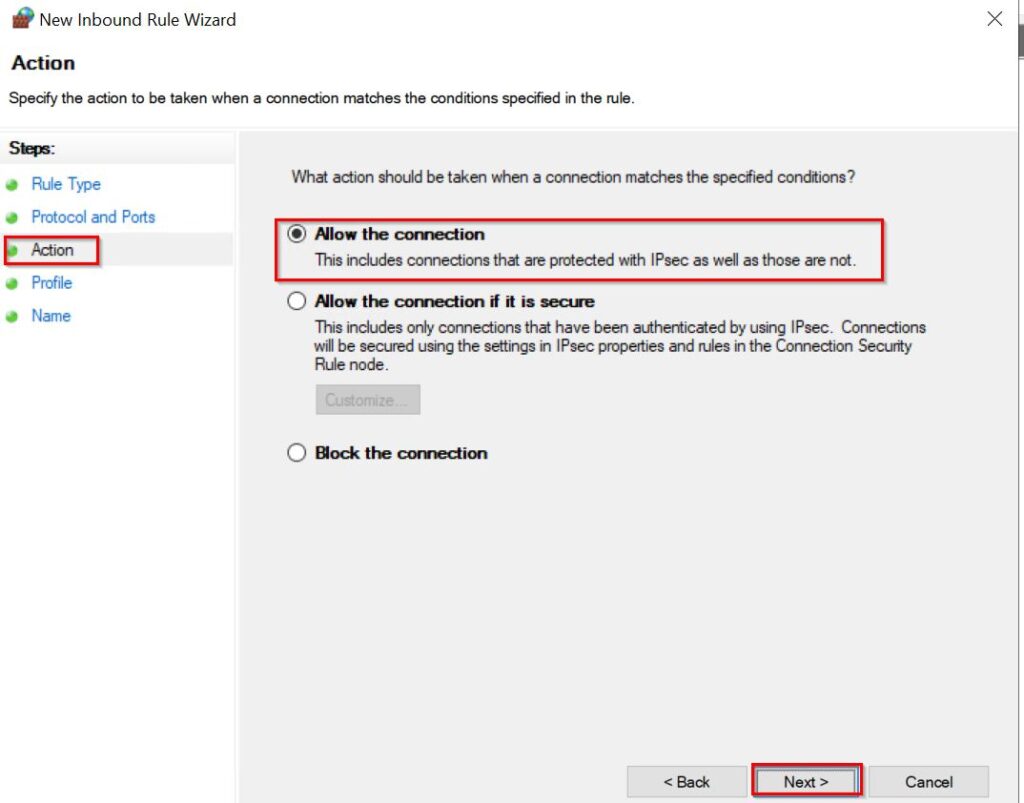
Allow the traffic to pass through firewall, so select allow the connection.
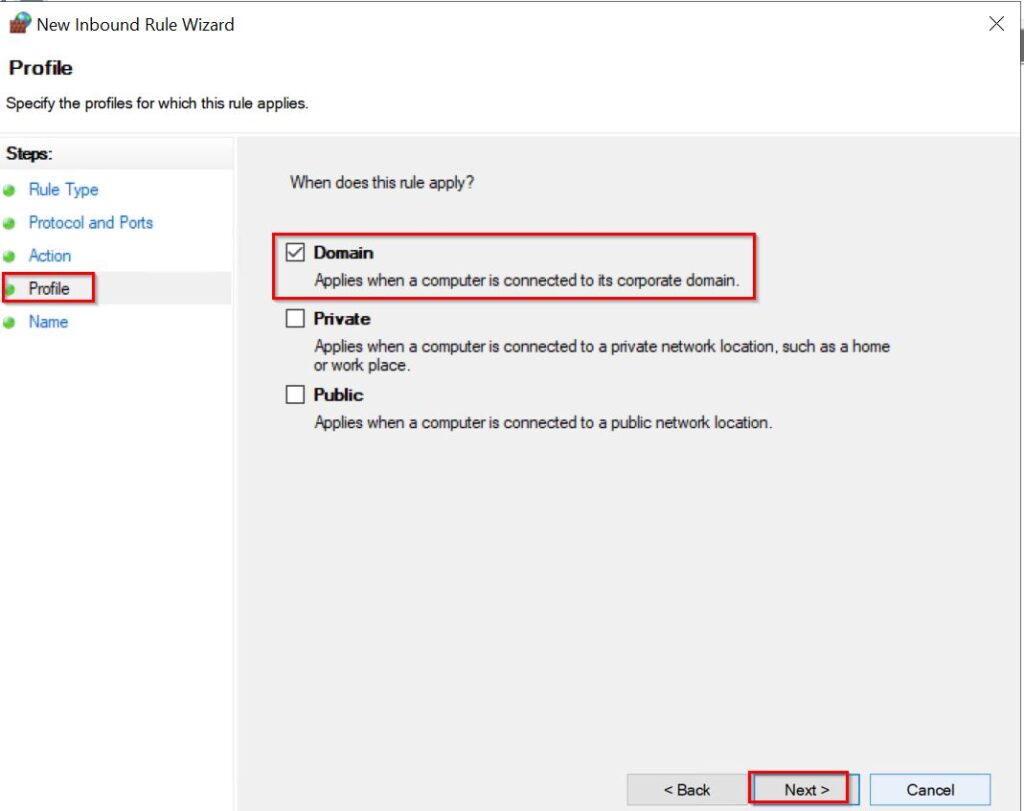
Select Profile, which is required as per requirement selected Domain.
Give the custom rule name something like Allow WinRM for Custom Port.

New custom rule has been created you can see below image.

Verify the connection in domain member server using the newly created custom WinRM listener port.
Login into domain member server called win21.apj.com
Open windows PowerShell run as administrator and mention the Computer Name of domain controller (Win20.apj.com).
you can see it was failed to establish the connection on default port 5985.Since we changed the port, need to specify the custom port number using -port switch.

Now we can see the connection to domain controller server is created successfully using custom port 9123.
conclusion:
you can see the session between domain controller and domain member server on custom port number 9123.
For migration of domain controller from one version to another version will get good overview.
Please let me know if you have any questions about change winrm listener port.


