The purpose of this post is to explain how to Upgrade vCenter 6.7 to vCenter 7.0 upgrading your appliance to the latest version will give you access to new features, improvements, and security updates.
Only vCenter 6.5 and vCenter 6.7 can be upgraded directly to vCenter 7.0. If you are still using vCenter 6.0 or earlier versions, consider upgrading to vCenter 6.5 or 6.7 first, and then to vCenter 7.0.
You can also perform a clean installation of vCenter 7.0 and configure that vCenter instance the same way you configured your old vCenter. Before upgrading vCenter, ensure that the vCenter Server upgrade is compatible. In the same cluster, vCenter 7 can manage ESXi 6.5, ESXi 6.7, and ESXi 7.0.
If your vCenter Server is managing distributed virtual switches older than v.6.5 before upgrading, you must upgrade the distributed virtual switches to v.6.5 or later. Otherwise, you will receive the following error:
Source vCenter Server has an instance of Distributed Virtual Switch at unsupported version.
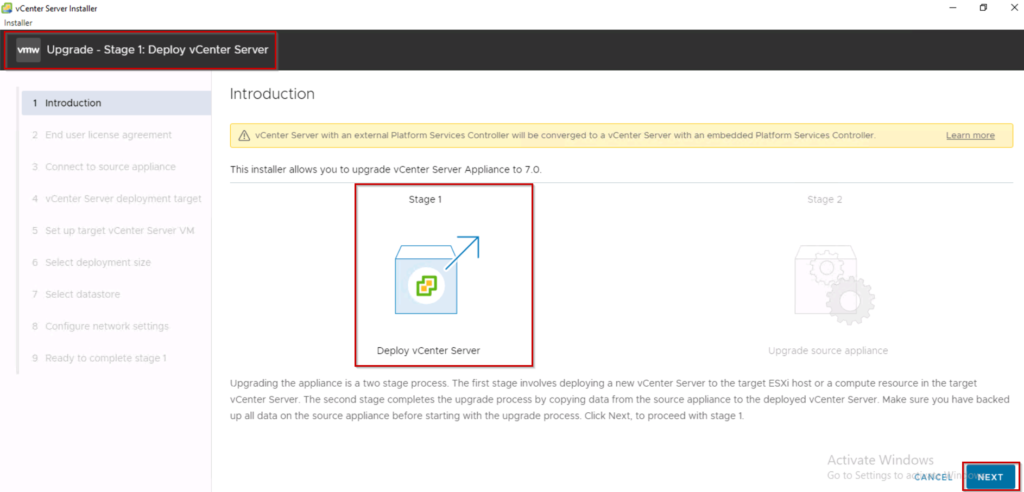
The upgrade has been accomplished in two stages.
- Stage 1: Deploy vCenter Server.
- Stage 2: Upgrade vCenter Server.
Prerequisites:
- ESXi hosts must be at version 6.5 or later.
- ESXi hosts must not be in lockdown or maintenance mode, and they must not be part of a fully automated DRS cluster.
- Take a snapshot of your existing vCenter server.
Upgrade vCenter 6.7 to vCenter 7.0
Before to start upgradation consider the following recommendations.
- check the compatibility of ESXi, and vCenter versions by using VMware matrix
- Check that you have the most recent backup of the vCenter server appliance.
- ESXi hosts should have their configuration backed up.
- Protect your infrastructure by backing up virtual appliances and virtual machines.
- Maintain one temporary IP address from the same subnet where the vCenter server 6.7 is installed.
- Enable SSH on the vCenter Server Appliance.
- Download VCSA 7.0 ISO
Upgrade – Stage 1: Deploy vCenter Server.
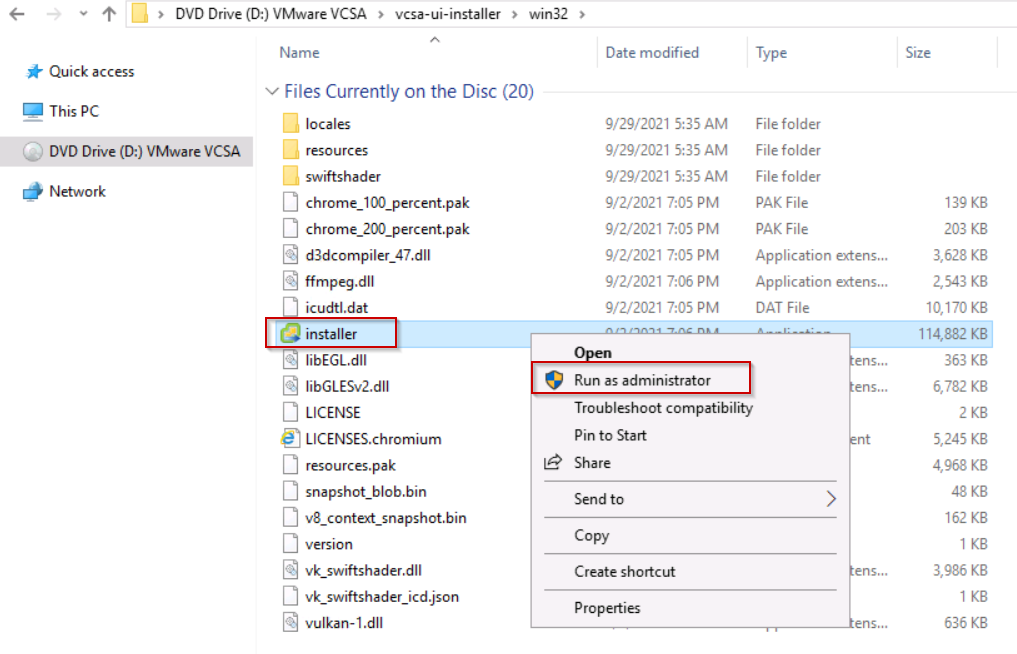
Step1: Open VCSA7.0 ISO image Windows machines and run as administrator.
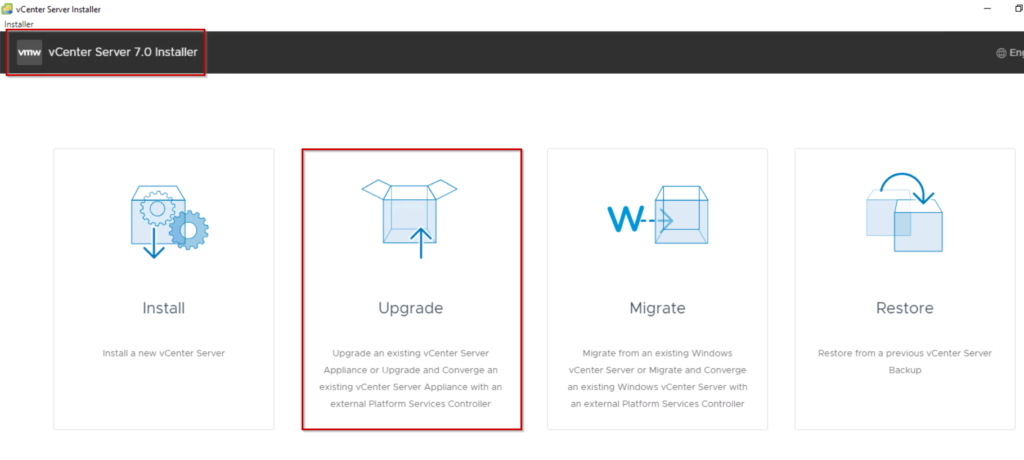
Step2 : Select upgrade option and click next
Step3: Deploy vCenter Server 7.0
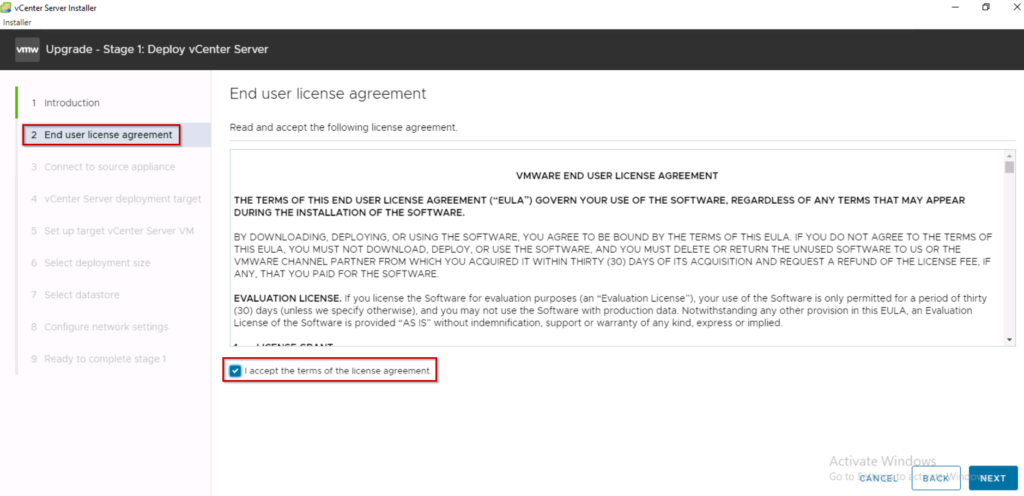
Step4: Accept End User License
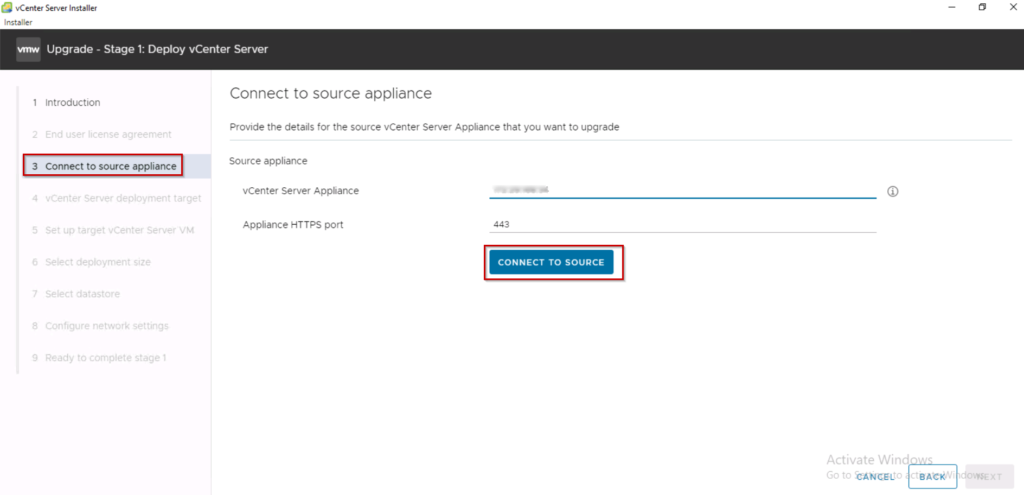
step5: It will connect to your vCenter Server Appliance to verify authentication.
Give IPaddress of VCSA at vCenter Server Appliance column and click Connect to Source button.
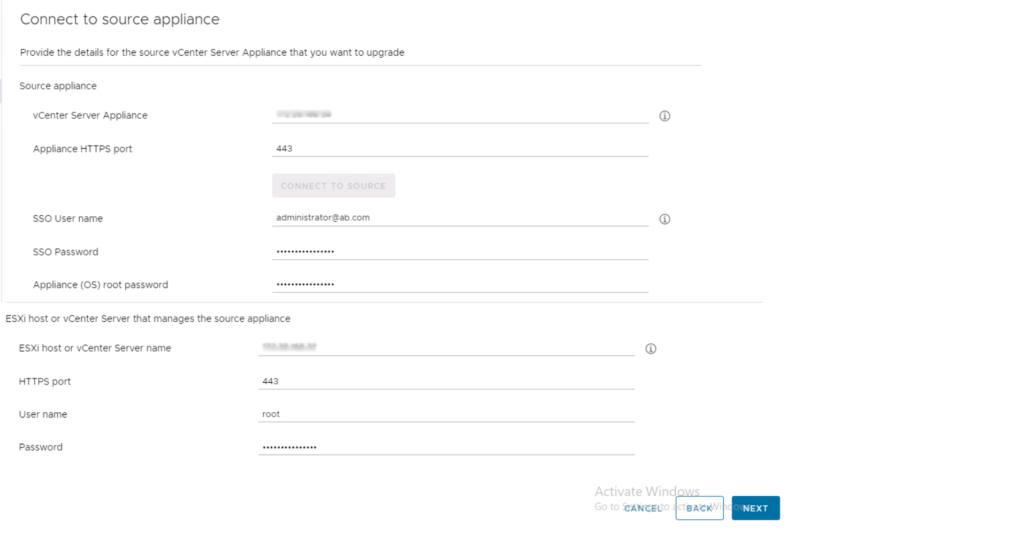
Once it connected it will ask for Single sign-on username and password along with root password for existing VCSA.
ESXI host details is required in which existing VCSA running.
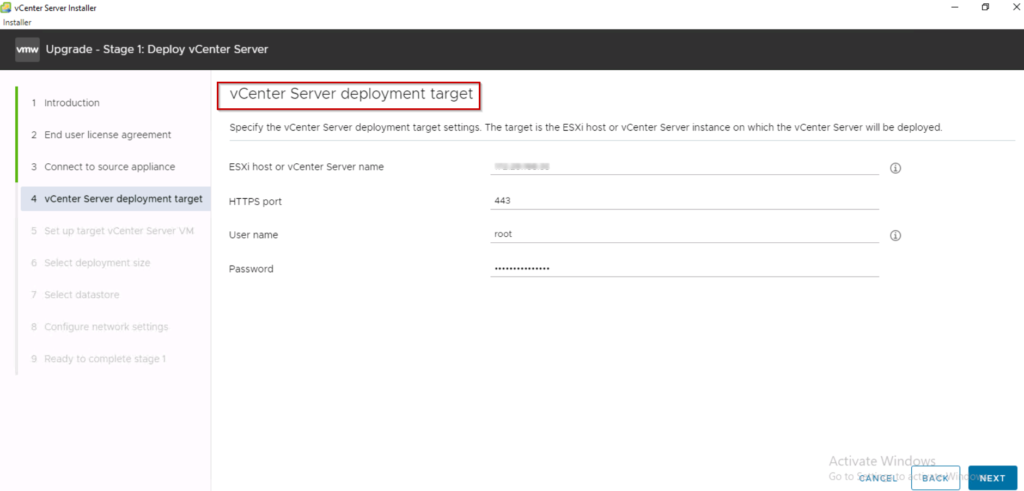
Step6: Provide your target ESXI host details.
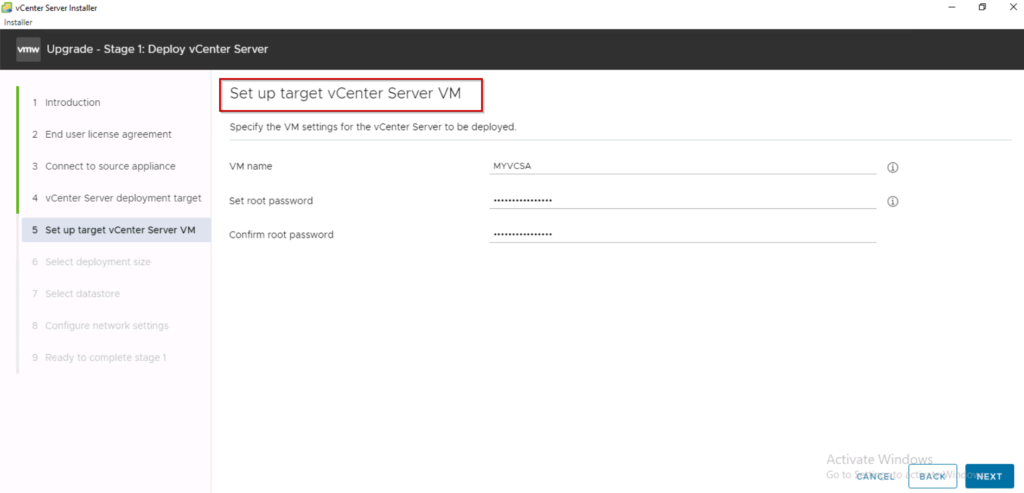
Provide new name for new vCenter Server Appliance and set new password for it.
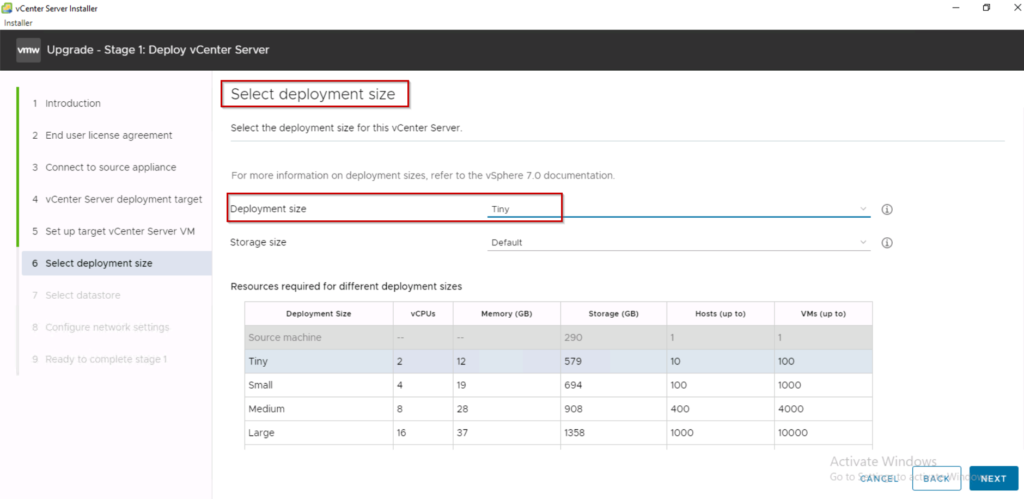
Step7: select Deployment size based on virtual infrastructure.
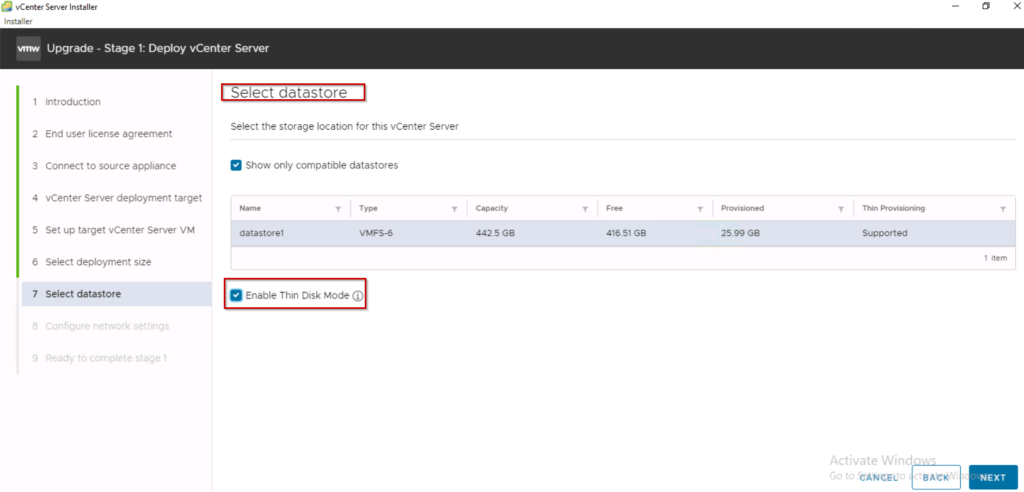
Step8: Select Datastore which is required.
Step9: Its key step for your new vCenter Server Appliance 7.0
Make sure that the un-used IP address is needed, and then add it to the Temporary IP address and provide subnet mask, default gateway for that IPaddress and it must be in DNS server.
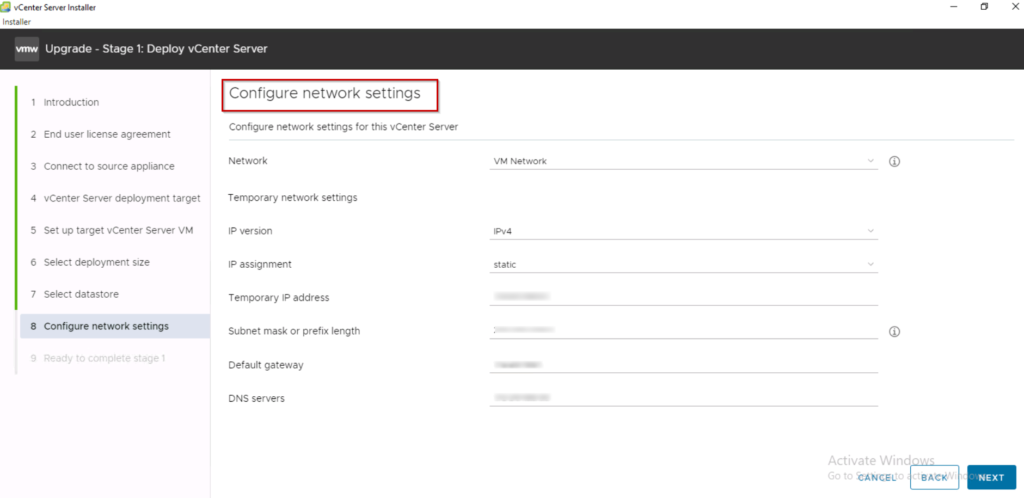
Make a note the network configuration details and click next.
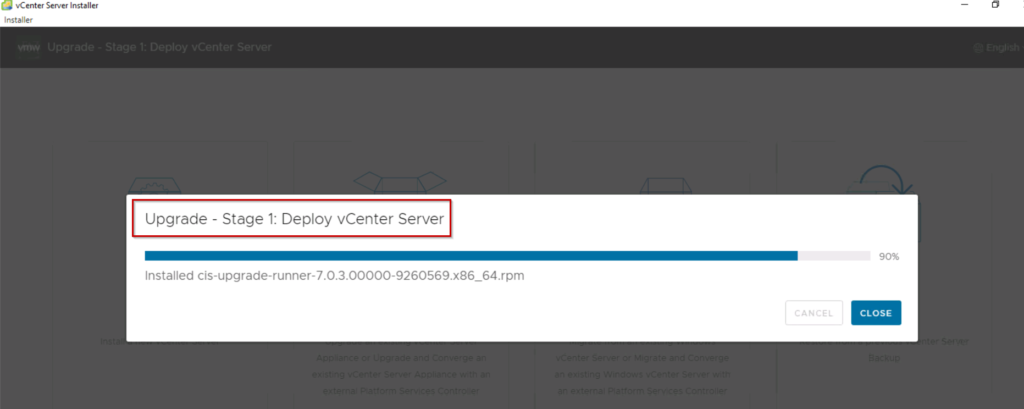
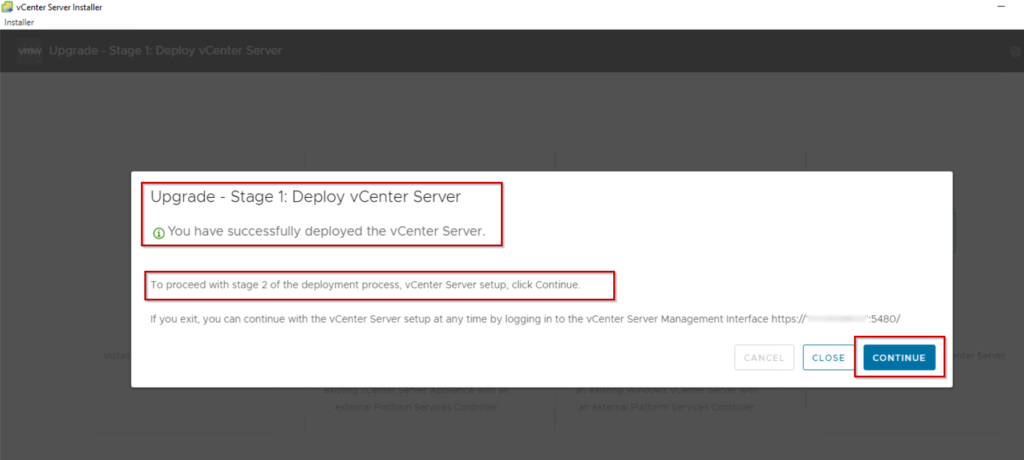
Upgrade – Stage 2: vCenter Server
step10: Select Upgrade source vCenter Server.
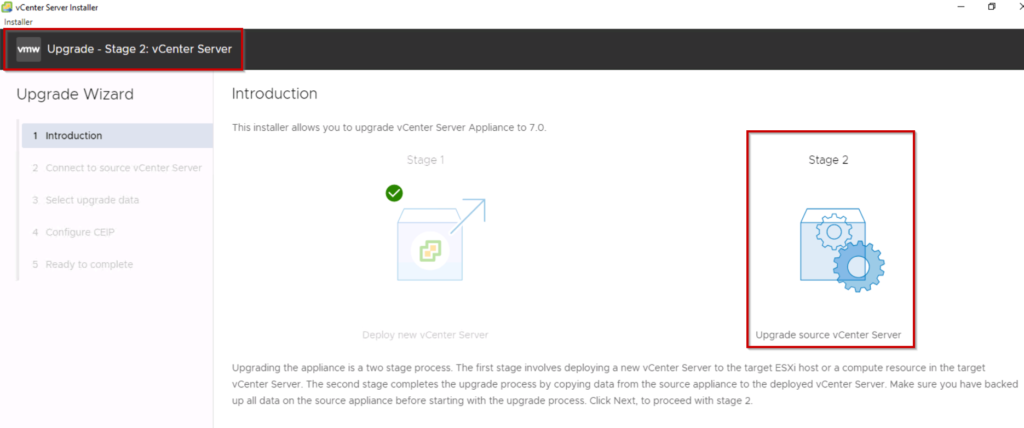
Step11: Connect to Source vCenter Server however SSH service should be enable state for on your existing vCenter Server Appliance.
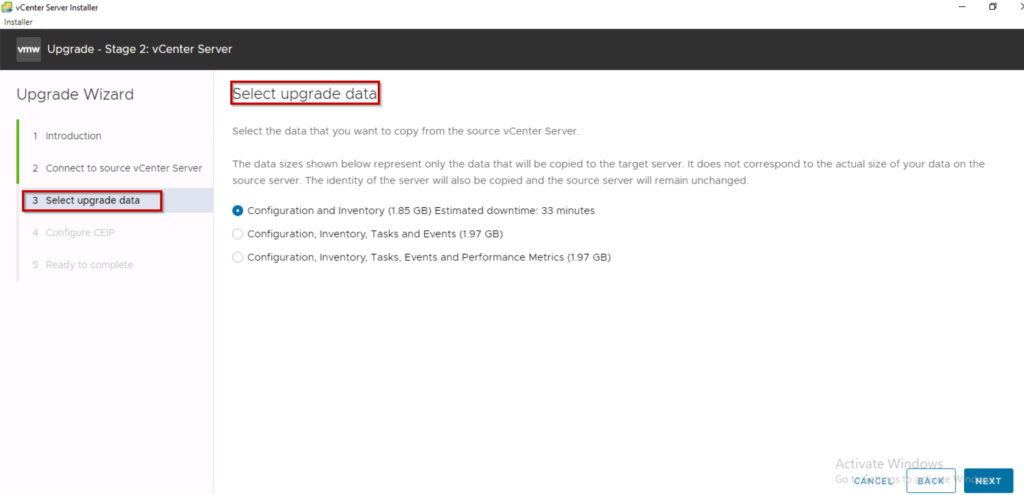
Step12: select upgrade data based on your Disk size and time required.
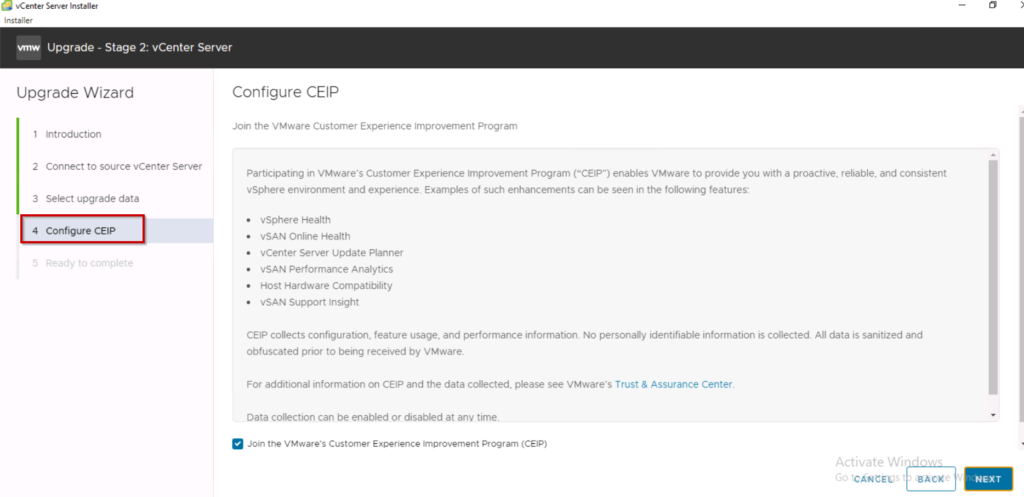
step13: Enable VMware’s Customer Experience Improvement Program (“CEIP”)
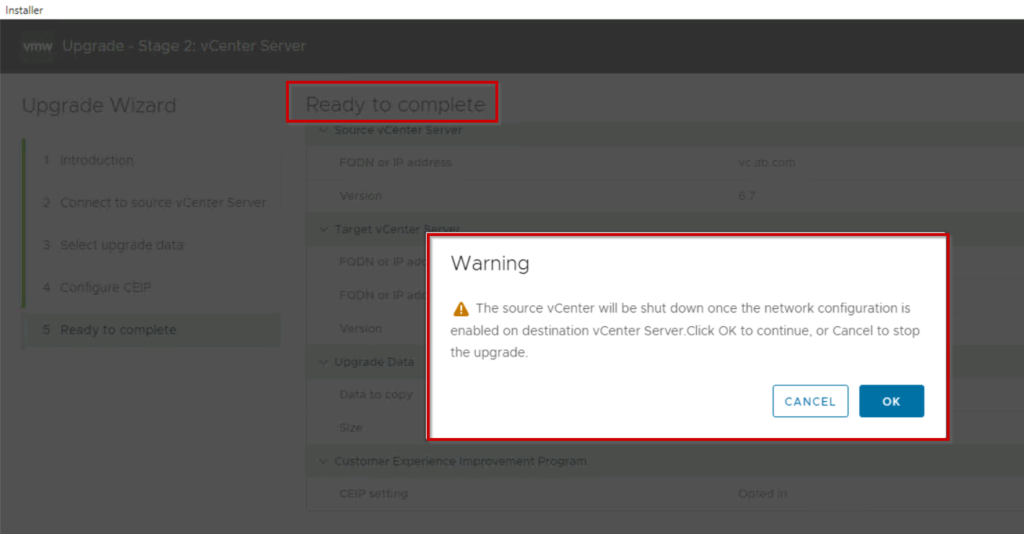
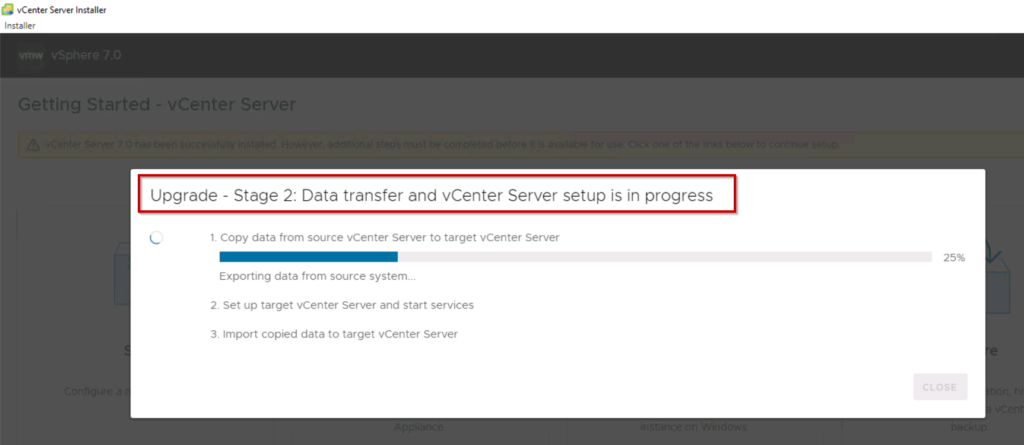
Ready to complete and start the process.
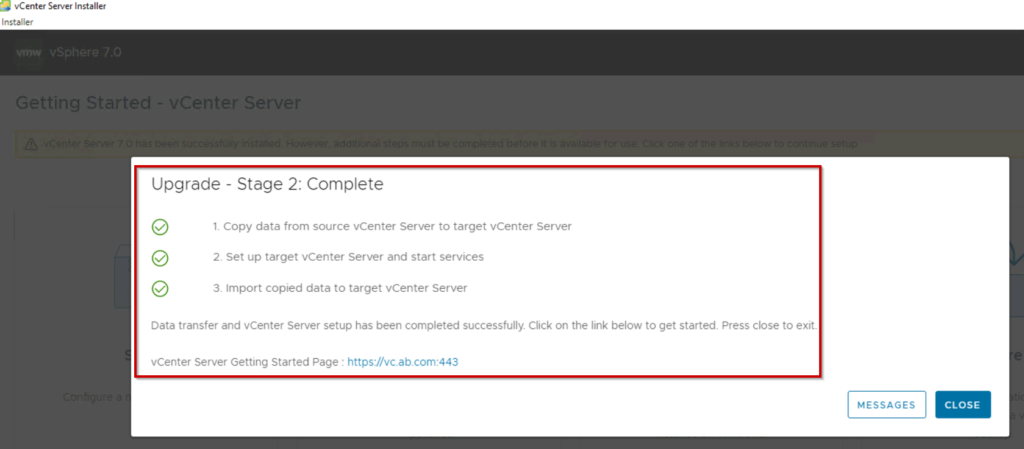
Now you can be able to login into new VCSA7.0 and also new vCenter server has shown above URL.
Upgrade vCenter 6.7 to vCenter 7.0 has been completed successfully.
conclusion:
We have completed the upgrade from vCenter 6.7 to vCenter 7.0. I hope you found this article useful.
For fresh installation of VMware vCenter Server Appliance 7 (VCSA) written a blog called VCSA7.0
Thanks for your time, leave a comment if you have any queries about How to Upgrade vCenter 6.7 to vCenter 7.0.

