In this blog will fix NSX Issues After Replacing VMware certificate in NSX Manager.
In VMware vCenter Server, all VMware Certificate Authority (VMCA)-signed certificates have been replaced with VMware Certificate Authority-signed certificates due some maintenance activity. After replacing the default self-signed certificates, NSX would not connect to the lookup service.
If the certificate is not a full chain, including Root, Intermediate, and Leaf certificates, when using Certificate Authority (CA). signed certificates on NSX Unified appliances. Keep reading to find out how to fix NSX Issues after replacing the VMware self-Signed certificate. For more information about replace certificate please check VMware docs.
NSX Issues After Replacing VMware
The following error occurred when I tried to connect from NSX Manager to VMware vCenter Server. This is due to the certificate getting the incorrect fingerprint from vCenter server, to fix this issue update the certificate with the old certificate thumbprint of the Security Token Services (STS).
Security Token Service (STS) for vCenter Single Sign-On issues, validates, and renews security tokens on a Web platform. In addition to signing tokens with a private key, the Security Token Service (STS) publishes the public certificate for services to verify the signature. VMware Directory Service manages and stores STS signing certificates.
Steps to Retrieve Old Certificate From the MOB
The old certificate can be retrieved from the Managed Object Browser (MOB) by following the steps below:
- Utilize the Managed Object Browser to retrieve the old STS certificate fingerprint from the VMware vCenter Server.
- Access Managed Object Browser (MOB) by using https://vCenter_IP ADDRESS/lookupservice/mob?moid=ServiceRegistration&method=List
- Log in to the browser by using VMware vCenter Server administrator local account administrator@vsphere.local
Delete everything in between <filterCriteria> to </filterCriteria> which is highlighted red colour as shown below.
<filterCriteria>
<siteId>Sample</siteId>
<nodeId>Sample</nodeId>
<serviceType>
<product>Sample</product>
<type>Sample</type>
</serviceType>
<endpointType>
<protocol>Sample</protocol>
<type>Sample</type>
</endpointType>
<endpointTrustAnchor>Sample</endpointTrustAnchor>
<searchAllSsoDomains>false</searchAllSsoDomains>
</filterCriteria>
4. After doing the above changes, in order to find “sts/STS” string in the page use Control+F and search for sts.
5. You could find any URI as shown below, copy the SSL Trust value from the line preceding this sts/STS string which is visible on Array of String. Copy this text into a notepad and save it as sts.cert
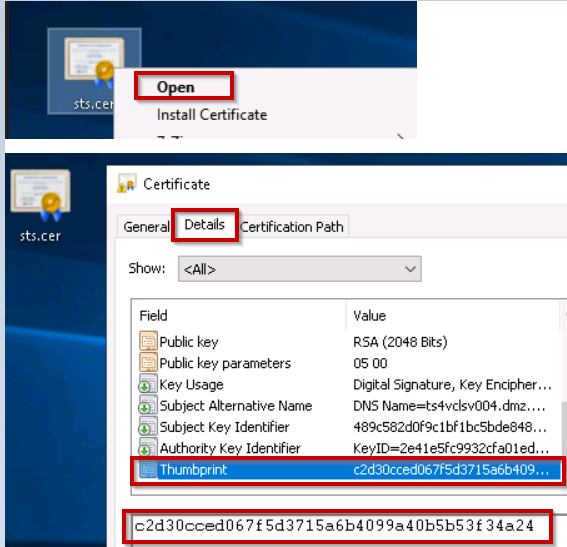
6. Now open the sts.cert file, find the fingerprint at details tab and look for the “Thumbprint” attributes. Copy the complete thumbprint value into a notepad. Remove all empty space if it is existing so that it’s a single string with no spaces in it. Save that file as old.print.txt.
Replace VMware Self-Signed Certificate
7. Login into VMware vCenter Server using ssh and create a new directory named “mycerts”.
cd /
mkdir mycerts
8. Run the below command to export new certificate to file
/usr/lib/vmware-vmafd/bin/vecs-cli entry getcert --store MACHINE_SSL_CERT --alias __MACHINE_CERT --output /mycerts/new_sts.crt
9. Using the following command, we can update our thumbprints on existing certificates
python /usr/lib/vmidentity/tools/scripts/ls_update_certs.py --url https://vcenterserverURL/lookupservice/sdk --fingerprint --certfile --user Administrator@vsphere.local --password YOURPASSWORD
After running this command, it will show the Updated 9 services for the appliance platform. When complete, you will see a message Like Updated 9 service(s)
10. Now try to Re-register my lookup service again, able to connect to VMware vcenter server from NSX-V without any issues.
Conclusion:
For both external and internal communication, NSX-V uses multiple self-signed certificates. However, when we replace VMware vCenter Server certificate at same time need to replace a self-signed certificate in NSX manager as well. If not, will face this kind of issue.
In my next article discussed about NSX-V upgradation.
Thanks for reading this article. I hope you find it useful. If you have a question about NSX Issues After Replacing VMware Self-Signed Certificate, please get in touch.


