The objective of this post is to explain how to install VCSA 7.0 on a VMware platform. Kubernetes and Tanzu are embedded in vSphere 7.0 to enable cloud-native workloads in the data center.
Before installing vCenter 7.0, you should understand three important information about the latest vSphere 7.0 enhancements and features.
- Removal of External Platform Services Controller: vCenter 7.0 does not require nor support the use of an external Platform Services Controller
- Removal of vCenter Server for Windows Support: VMware vSphere 7.0 no longer supports vCenter Server for Windows
- Deprecation of Image-Based Backup and Restore Support for vCenter Server: Backups and restores based on images are deprecated in vCenter Server 7.0 and will not be supported.
Please take a moment to check the compatibility of ESXi, and vCenter versions in order to begin the installation process.
Pre-requisites:
- To deploy vCenter Server 7.0 appliance you need an ESXi host 6.5 or later version.
- ESXi host and vCenter appliance use the same DNS server.
- An ISO image of VCSA 7.0 is required on a Windows computer.
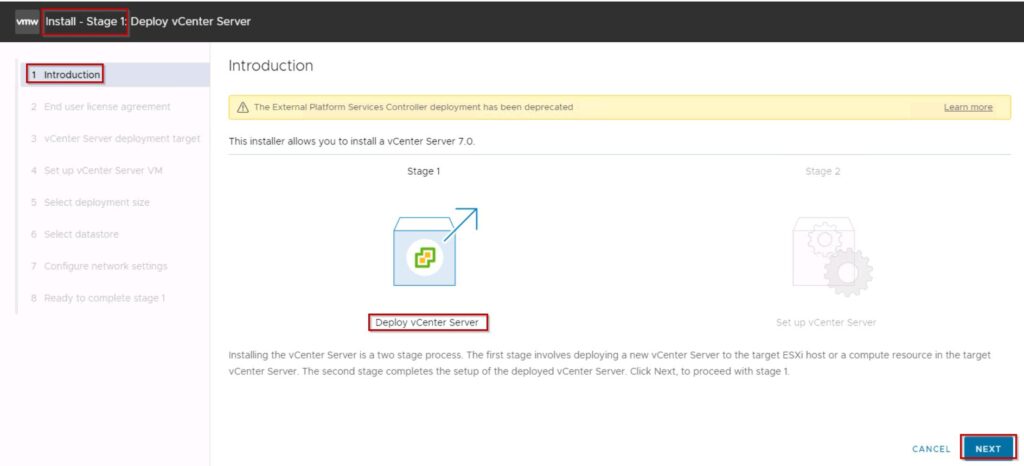
Two stages are involved in installing and configuring the vCenter Server Appliance(VCSA).
Stage 1: Deploy vCenter Server.
Stage 2: Set Up vCenter Server.
Procedure To Install VCSA 7.0
Stage 1: Deploy vCenter Server.
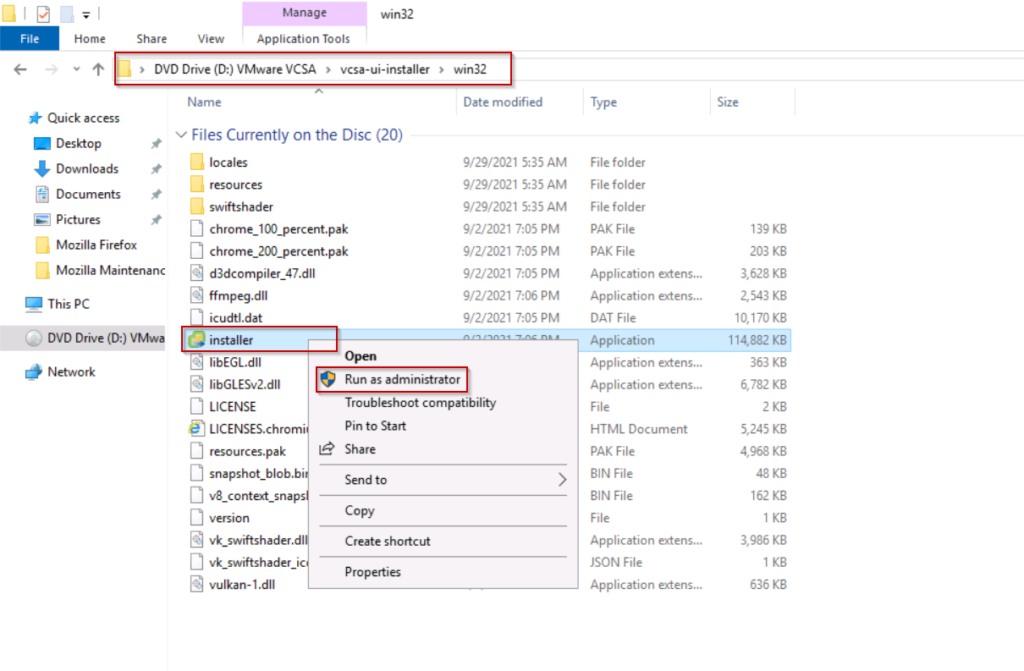
Step1: Mount vCenter Server Appliance (VCSA) 7.0 ISO image on windows machine. Open the ISO image, right click on installer and Run as Administrator
Step2: For the installer, you will see the following screen.
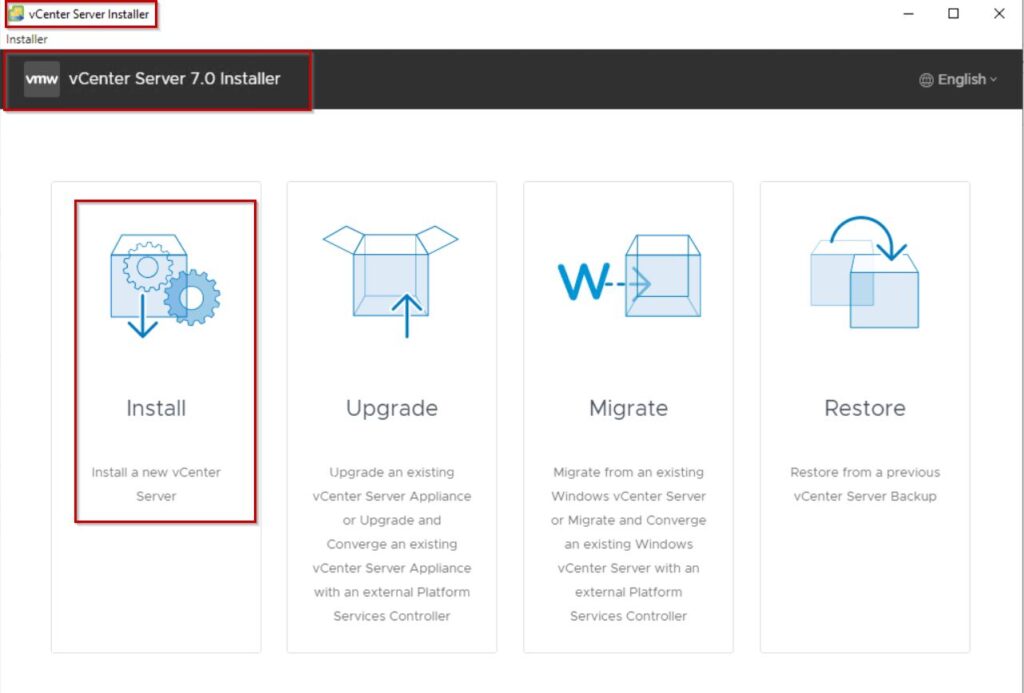
Step3: Select vCenter Server Deployment option.
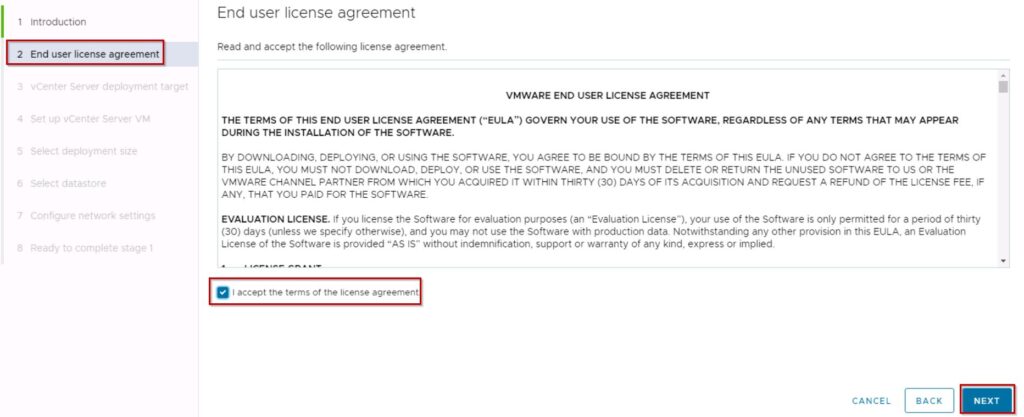
Step4: Accept the License
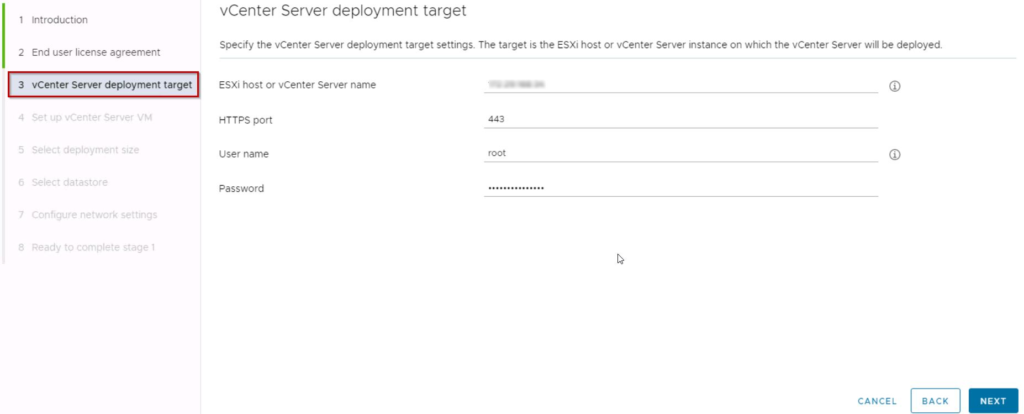
step5: Provide your ESXI host IPaddress along with username and password. Hence VCSA7.0 will deploy on that ESXi host.
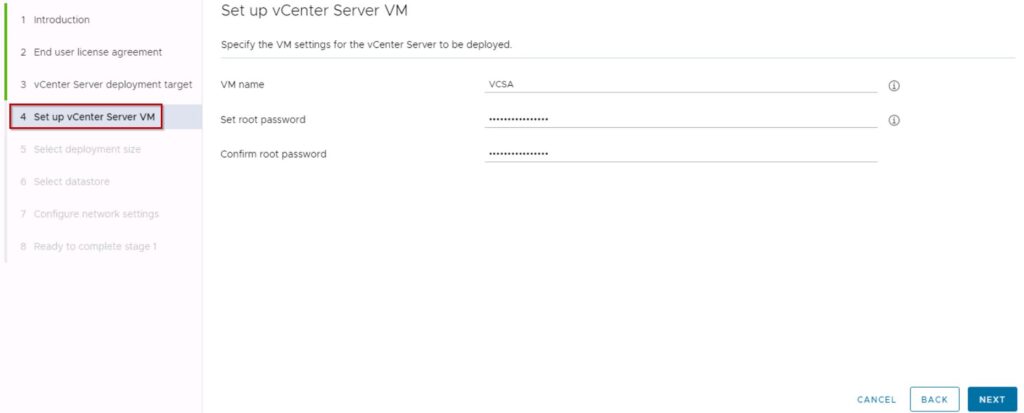
Step6: Provide vCenter server name as you like and password. By default, it will consider username as root.
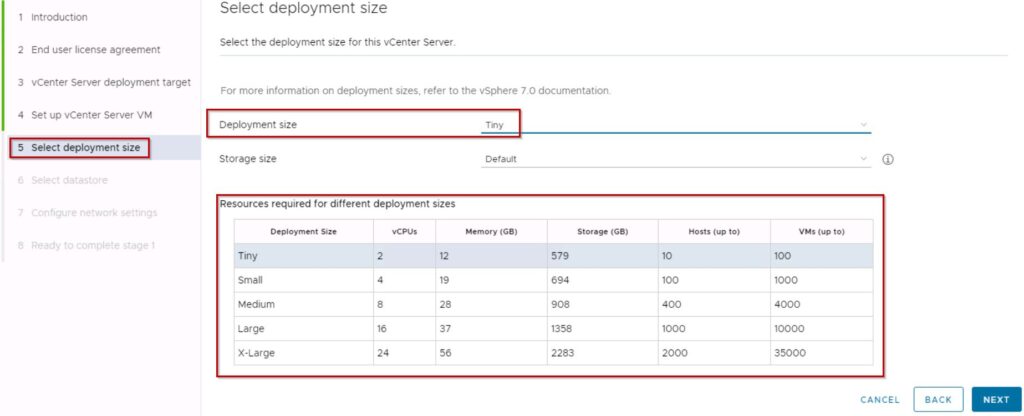
Step7: Select Deployment Size as per your requirement.
Step8: Select the datastore which is attached to ESXI host.

Step9: This is important step which we are going to provide your vCenter Server IPaddress, Sub netmask, Gateway and DNS server IPaddress .
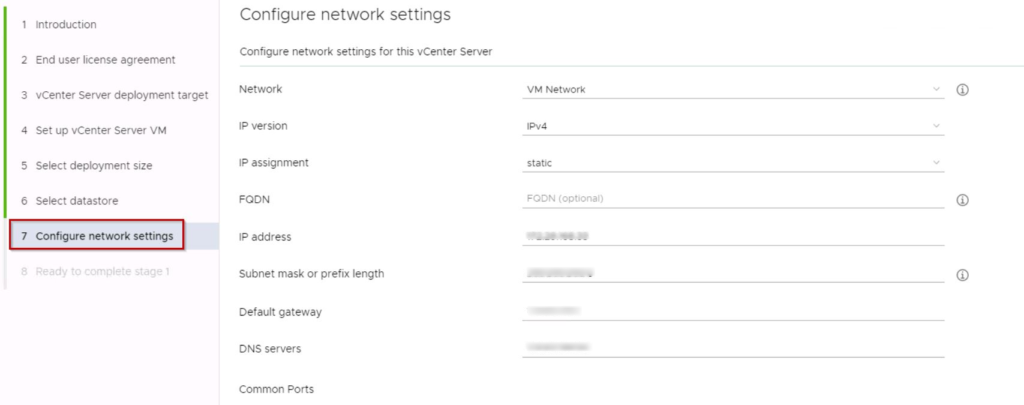
Step10: Once step9 is complete click on NEXT and check the details once again and proceed for stage1 installation as shown below.
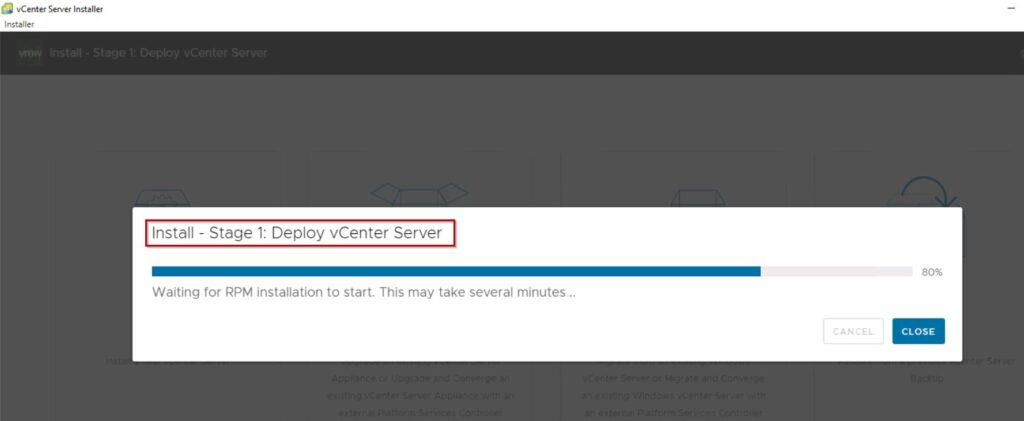
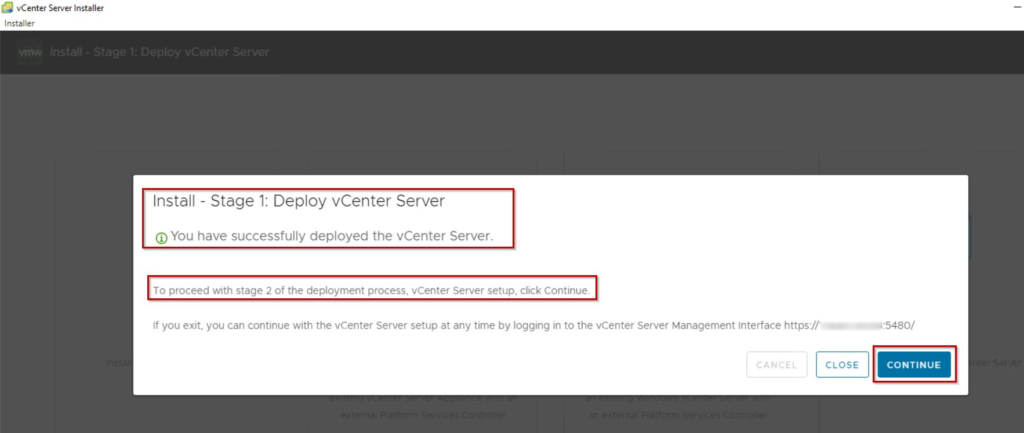
Stage 2: Set Up vCenter Server
Step11: Select Stage2 and click on Next.
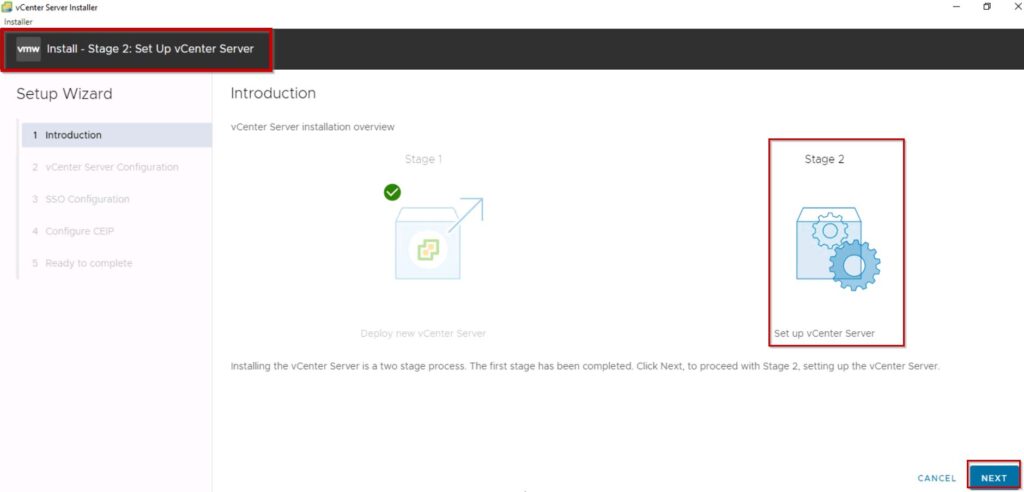
Step12: If you have any NTP server provided details and if needed enable SSH to access vCenter Server Appliance in CLI mode.

Step13: Single sign-on (SSO) is an authentication method need to be enabled in order to access vCenter Server. I have a domain called ab.com so provided as a Single sign-on (SSO) domain name.
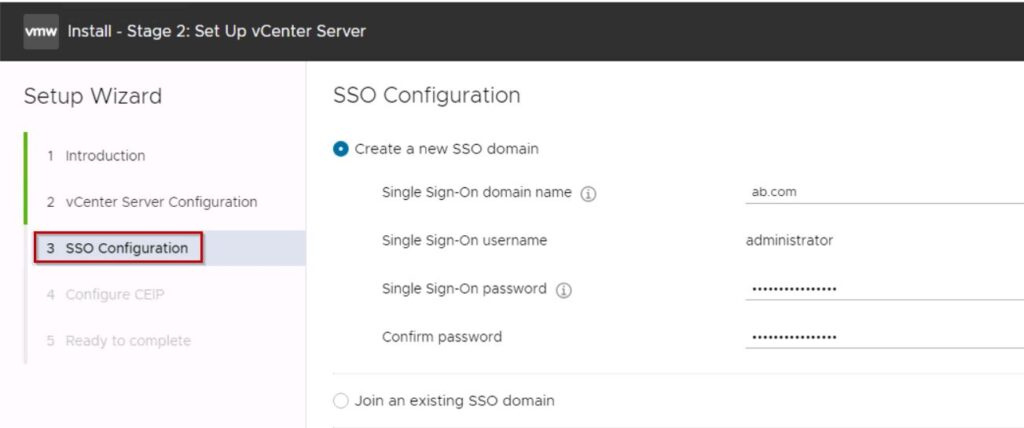
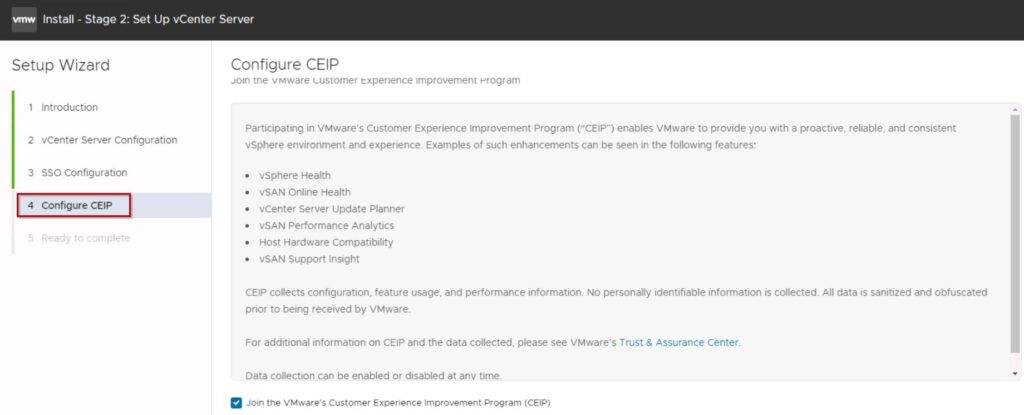
Step14: Enable VMware’s Customer Experience Improvement Program (“CEIP”)
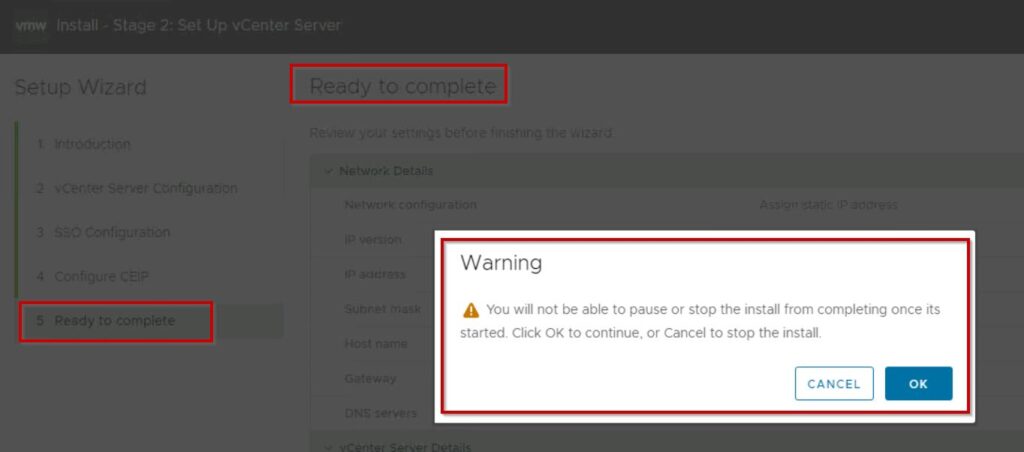
Step15: Now it’s ready to complete. Make a note everything in this step.
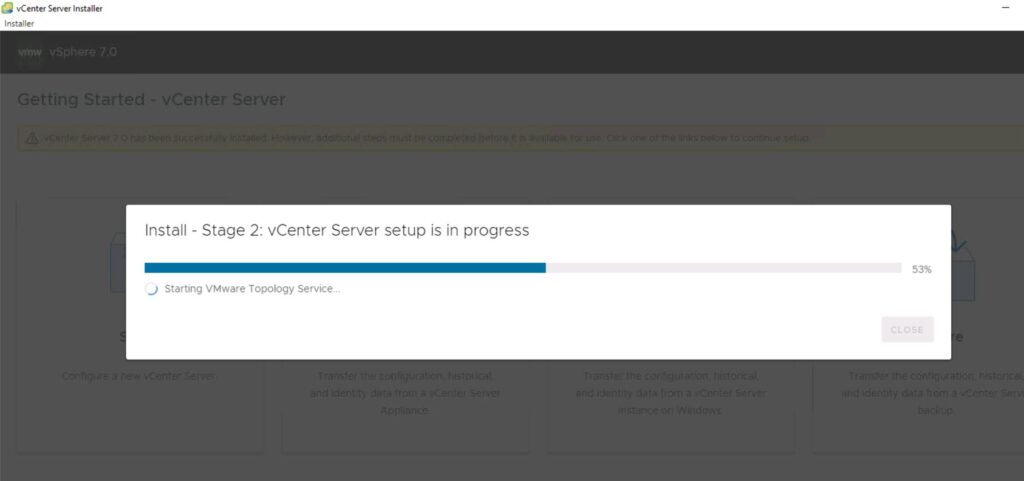
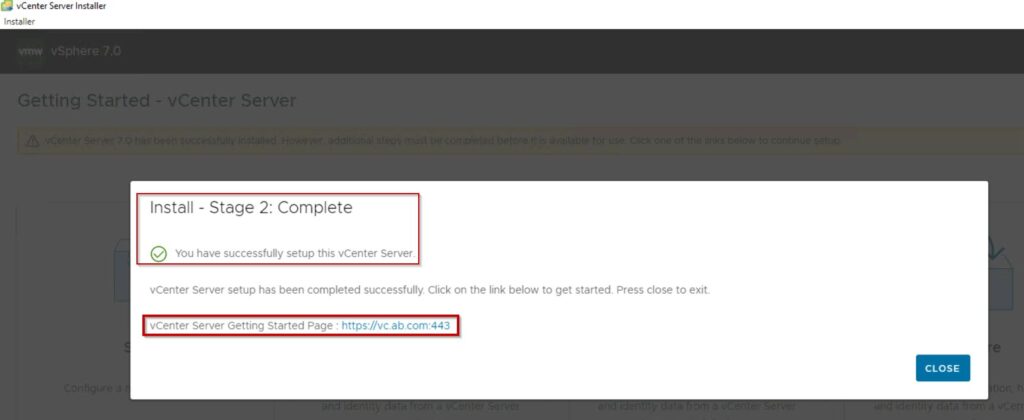
Step16: Finally, Stage2 has been completed successfully and now try to login into the vCenter Server.
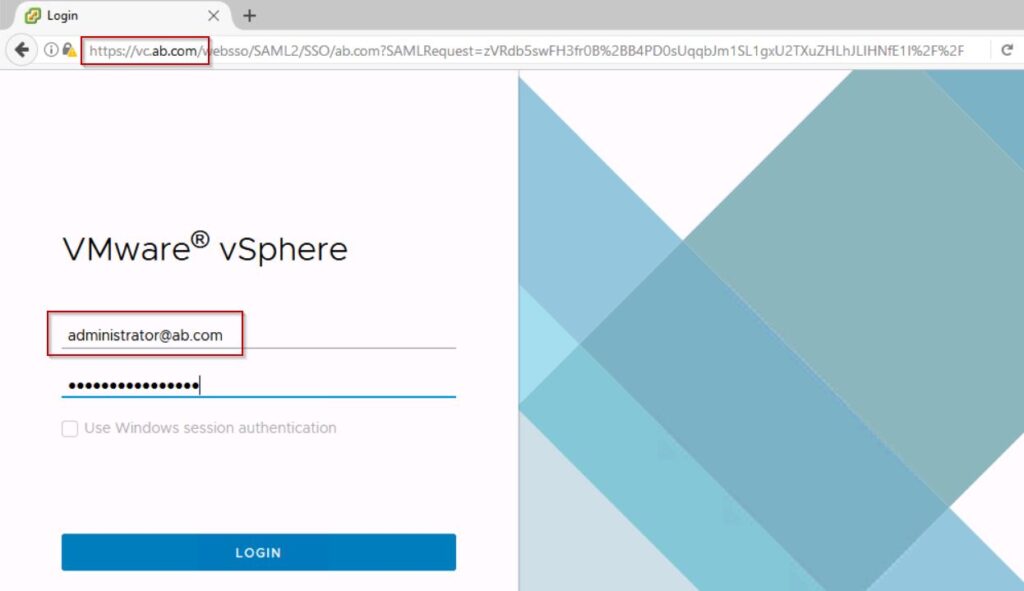
login into vCenter server and add the ESXI host.
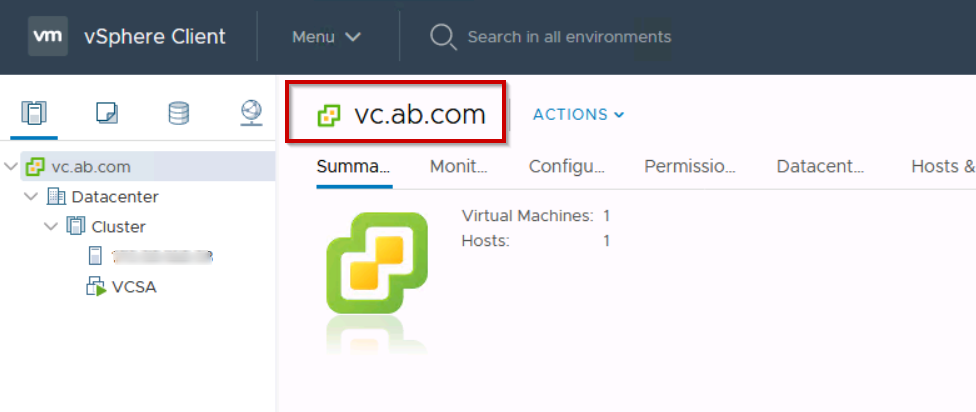
conclusion:
Before the 60-day evaluation period expires, you must apply a new vCenter Server license key. How To Install VCSA 7.0 has been completed step by step successfully.
If you are using VCSA6.7 follow VCSA6.7 for upgradation. I appreciate your time, if you have any questions about How To Install VCSA 7.0, please leave a comment.

