In this article, will explain the prerequisites and procedures to deploy the NSX-T Data Center Installation on the VMware vSphere Platform.
Before going to start NSX-T Data Center Installation on vSphere level please check compatibility matrix in vmware.
Globally, 80% of datacenters will be software-defined by 2022.
Software Defined Datacenters are optimized for rapid application development and delivery to any device for safe and secure consumption.
Virtualizing all infrastructure components in software architecture such as Compute ,Storage ,Networking and Security through abstraction layer and creating a basic pool of resource and then automatically those resource Delivery as a Service (DaaS).This concept is called software defined datacenter.
Main features of VMware Software-defined data center Building Blocks:
- Compute: With vSphere, your CPU and memory will be virtualized.
- Storage: vSAN which actually virtualized your storage.
- Networking: NSX Provide all networking and security components into software.
Network virtualization Transformers (NSX-T) enhanced those further by adding routing, firewalling, and load-balancing capabilities.
As we know NSX-V can be managed (or) exist through vCenter user interface but NSX-T has a dedicated user interface through which we can manage and configure the entire network and security service provided by NSX-T.
NSX-T Key Points:
- 3-tier architecture: There is full redundancy in the management, control, and data planes.
- Limitation of unwanted and risky East-West traffic between servers using micro-segmentation.
- Monitoring and analysis of the network workload in depth.
- Provide Network Services like Virtual Private Network, Ethernet Virtual Private Network Tenant, Network Address Translation, Load Balancing ,Forwarding Polices.
- In NSX-T, we can deploy up to three manager nodes to provide High availability.
Procedure for deploying VMware NSX-T Data Center:
Step1 : From the VMware download portal, you can download the VMware NSX-T Data Center 3.2.0.1 OVA file. From ESXi host Right-click and select Deploy NSX-T Data Center 3.2.0.1 OVF template to start the installation wizard.
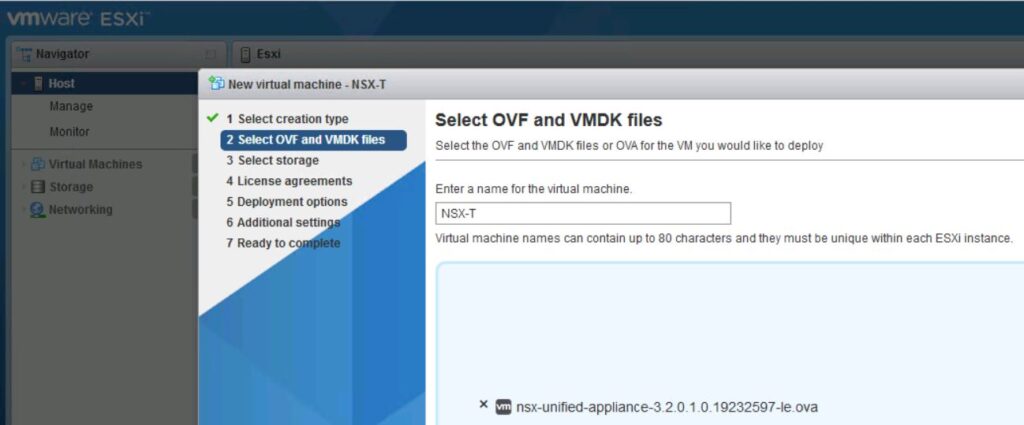
Step2 : Select the storage for deployment. Make ensure 120GB Free space is required.

Step3: Select the Deployment options .Generally, there are 4 options available they are Extra Small, Small ,Medium ,Large.
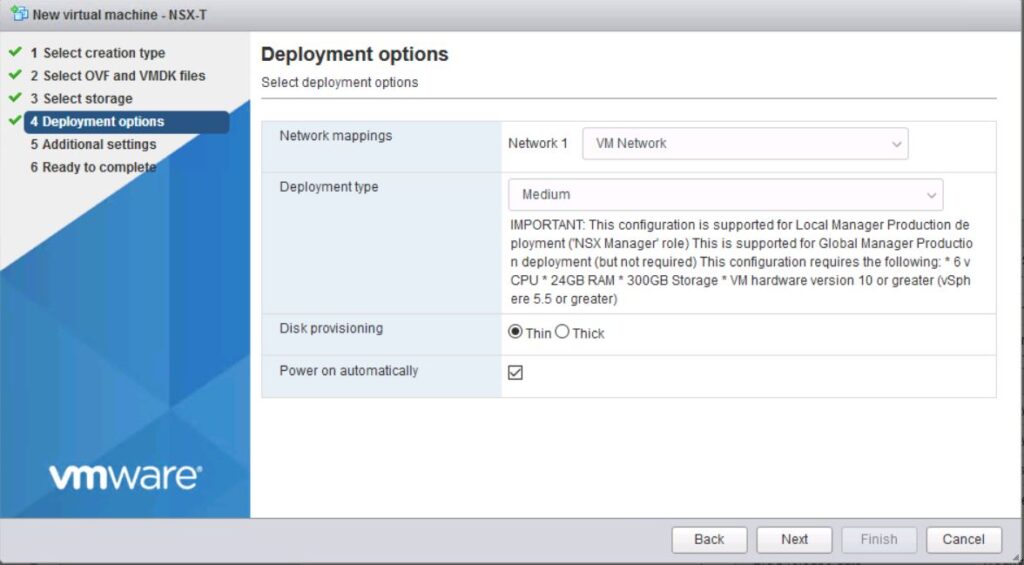
Step4: Most Important step here called Additional Settings.
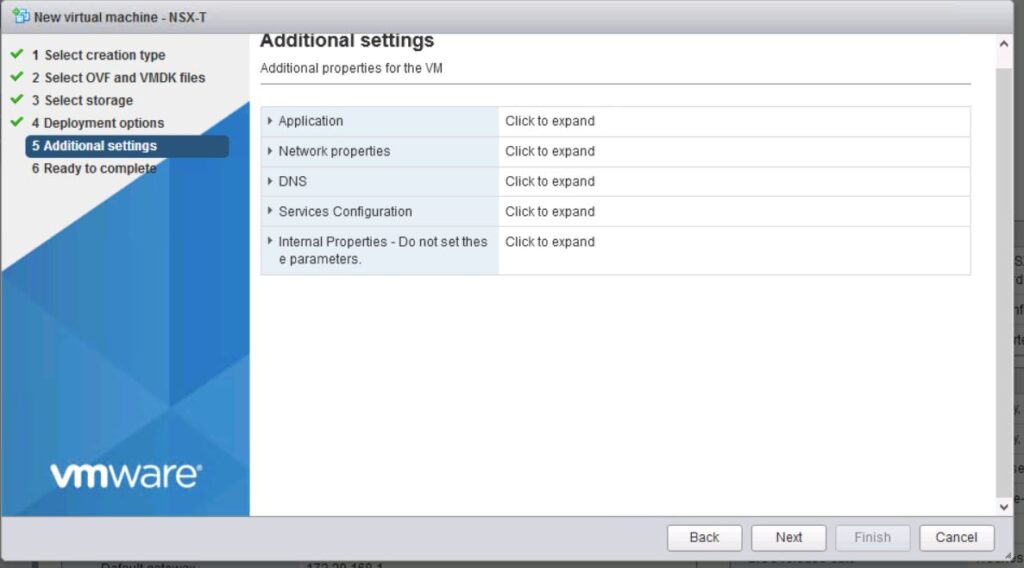
It is a little bit lengthy to give each and every detail screenshot, so we’ve provided a short explanation below.
Application:
- System GRUB Root User Password.
- System Root User Password.
- CLI admin User Password.
- CLI audit User Password.
Network Properties & DNS :
- NSX Site Name.
- Management Network IPv4 address.
- Management Network Netmask.
- Default IPv4 Gateway.
- DNS server IPaddress.
Service Configuration:
- NTP Server List.
- Enable SSH.
- Allow root SSH logins.
Internal Properties : leave them as default
Step5: Check that all the custom OVF template specifications are accurate before clicking Finish to start the installation.
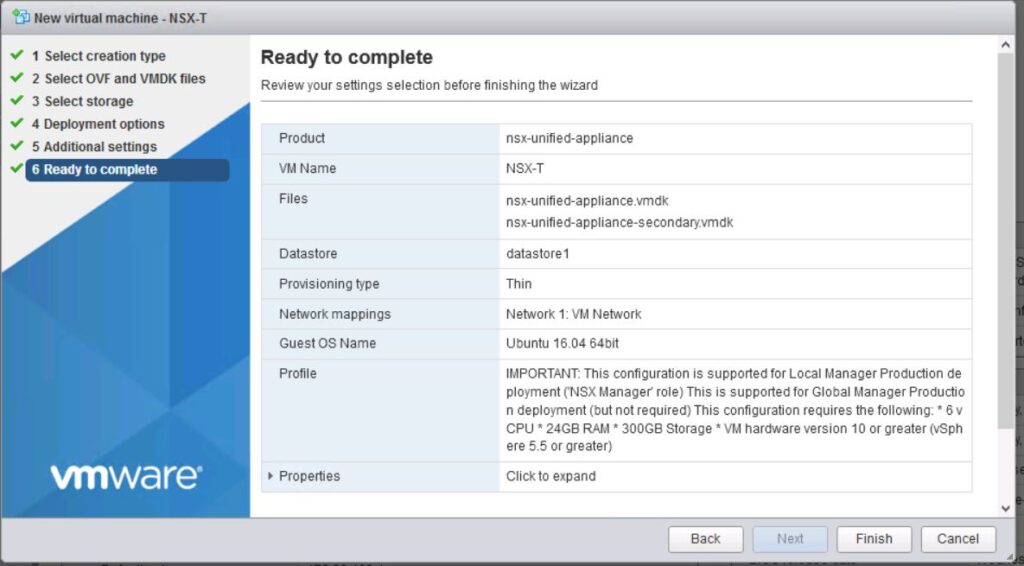
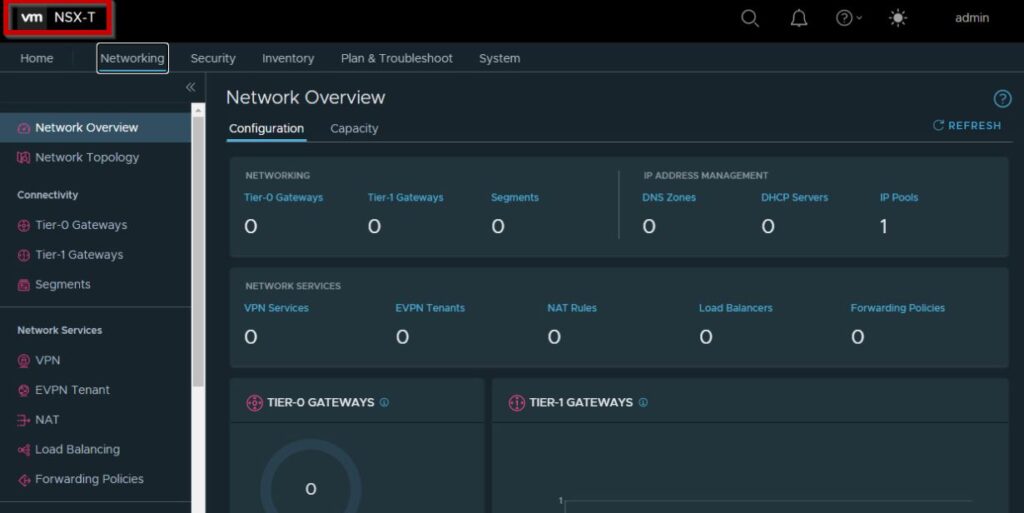
After the installation is complete, log in with admin privileges to the NSX-T Manager from your browser using using https://<nsx-t-manager-ipaddress>
In VMware NSX-T, the default user is admin.

Conclusion:
Recently VMware NSX-T Data Center 3.2.0.1 was released with a number of new features and enhancements. As a part of this post, we discussed the only deployment of NSX-T Manager and we’ll be sharing more posts on how we can test the features.
NSX-T Data Center Installation completed successfully.
In my previous article gives you short introduction of NSX datacenter
If you find the information worthwhile, please let others know.

